Purpose: Learn how to to use and filter the Timeline feature on Contacts or Custom Object records in order to view the record's history of emails, Activities, field updates, and automated actions.
TABLE OF CONTENTS
What are Timelines?
The Timeline feature is essentially an audit log of all the events that have taken place for a Contact or Custom Object record. Here are the events you can track on the Timeline:
- Record Creation: the date and time the record was created (and which team member created the record)
- Field Updates: whenever a field value is added, changed, or removed on the record
- Notes: whenever a Note is added to the record
- Activities: when an Activity is scheduled or logged
- Agentic Workflows: when an Agentic Workflows is started, resumed, paused, or cancelled
- Emails: when an email is sent, opened, link clicked, or attachment opened
- Forms & Surveys: when a form or survey is submitted by the related Contact on the record (email address must match)
- Subscription Lists: when the Contact subscribes or unsubscribes to a specific subscription list
Timeline entries include the name of the entry type (Agentic Workflow, note, etc), which team member completed the action, and the date of the action. This is useful for documenting and tracking any and all interactions with the Contact or Custom Object record.
How to Navigate and Filter the Timeline
What are the Timeline Filter Types?
Timelines can be filtered by a few components:
 Objects: Filter by Related Objects (i.e. contacts, companies, etc.)
 Event Type: Filter by different actions (i.e. Activities Logged, Agentic Workflow, messages sent, etc.)
 Fields: Toggle this on to see what fields have been updated or changed.
 Comments: Filter by comments made by members of your team on Timeline updates.
 Role: Filter by a specific type of user role.
 Team Member: Filter by specific team members in your account.
 Date: Filter by a custom date range or specific timeframe, such as for all time, this year, etc.
⚠️ Warning: All Timeline filters are "sticky" — any filter you apply will remain, until you clear them. How To Filter Timelines
- Open the Contact record or Object record.
- Scroll down to the "Timeline" section.

- Click on the Object, Event Type, Team Member, etc. that you want to filter for.
- Click on "Apply" in the bottom right of the dropdown menu:

Timeline Features
How to Comment on a Timeline
In Kizen, you can communicate and collaborate with your team members without even leaving the platform! You can leave a comment directly in the Timeline of a Contact or Custom Object record by clicking on the chat icon. You can even mention a team member to notify them directly.
- Click on the comment icon to the right of the Timeline event. (If the event is long, you may have to scroll down to see the textbox.)

- In the textbox window, type your note or @ mention the team member whom you want to notify.
- Click on the blue send button on the bottom of the window.

⚠️ Warning: At this time, comments cannot be deleted from the Timeline.How to Share Timelines Between Related Objects
There are times you may want to see the same Timeline events on related objects. Timelines can be shared between related object records by adjusting your Object settings.
For example, if you run a pet spa, all owner Contact profiles and their associated pet Custom Object profiles can share a Timeline. From the owner’s Contact profile, all Activity entries from their linked pet records will appear on that shared Timeline.
To identify the link between Related Objects, simply click on the blue text "Relationship Details" next to a timeline entry:

How to Hide Timelines Between Related Objects
For Custom Objects that you do not want to have a Related Object's timeline associated with them, you can un-share the Related Object's Timeline and vice versa.
- Go to the Custom Objects page.
- Go to the "..." menu next to the Custom Object you want to hide the timeline for > Click on
"Edit Object Settings":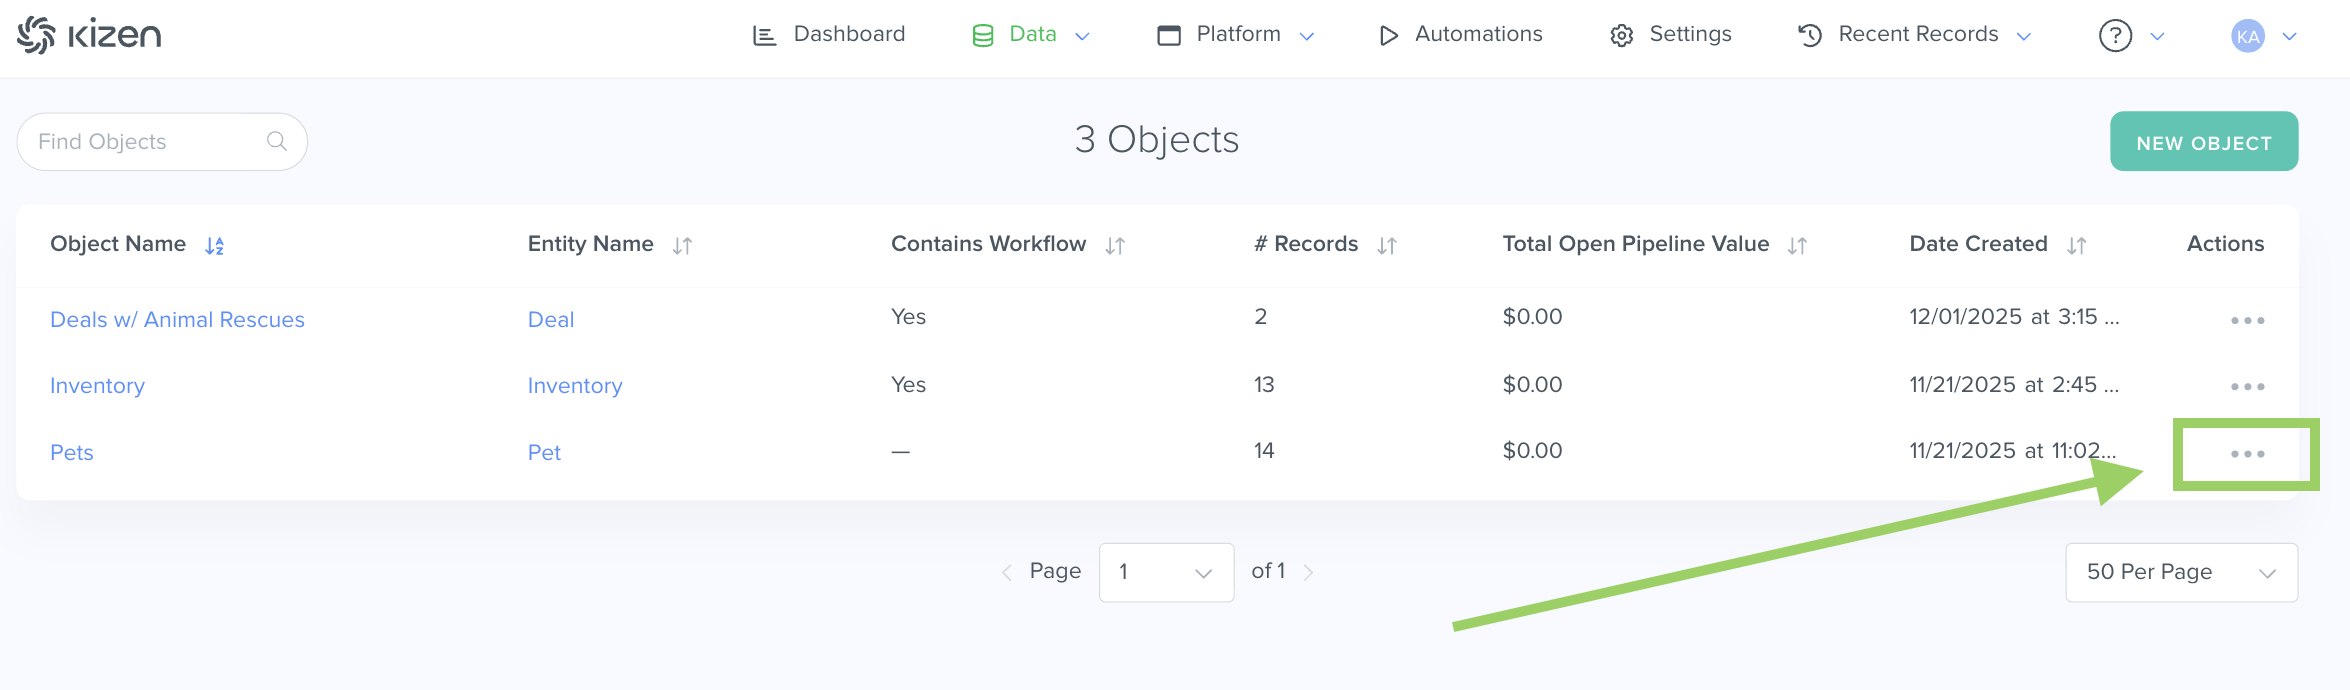
- In the Object settings, click on "Related Objects."
- Toggle off "Share Timeline to Related" and/or "Share Timeline From Related."
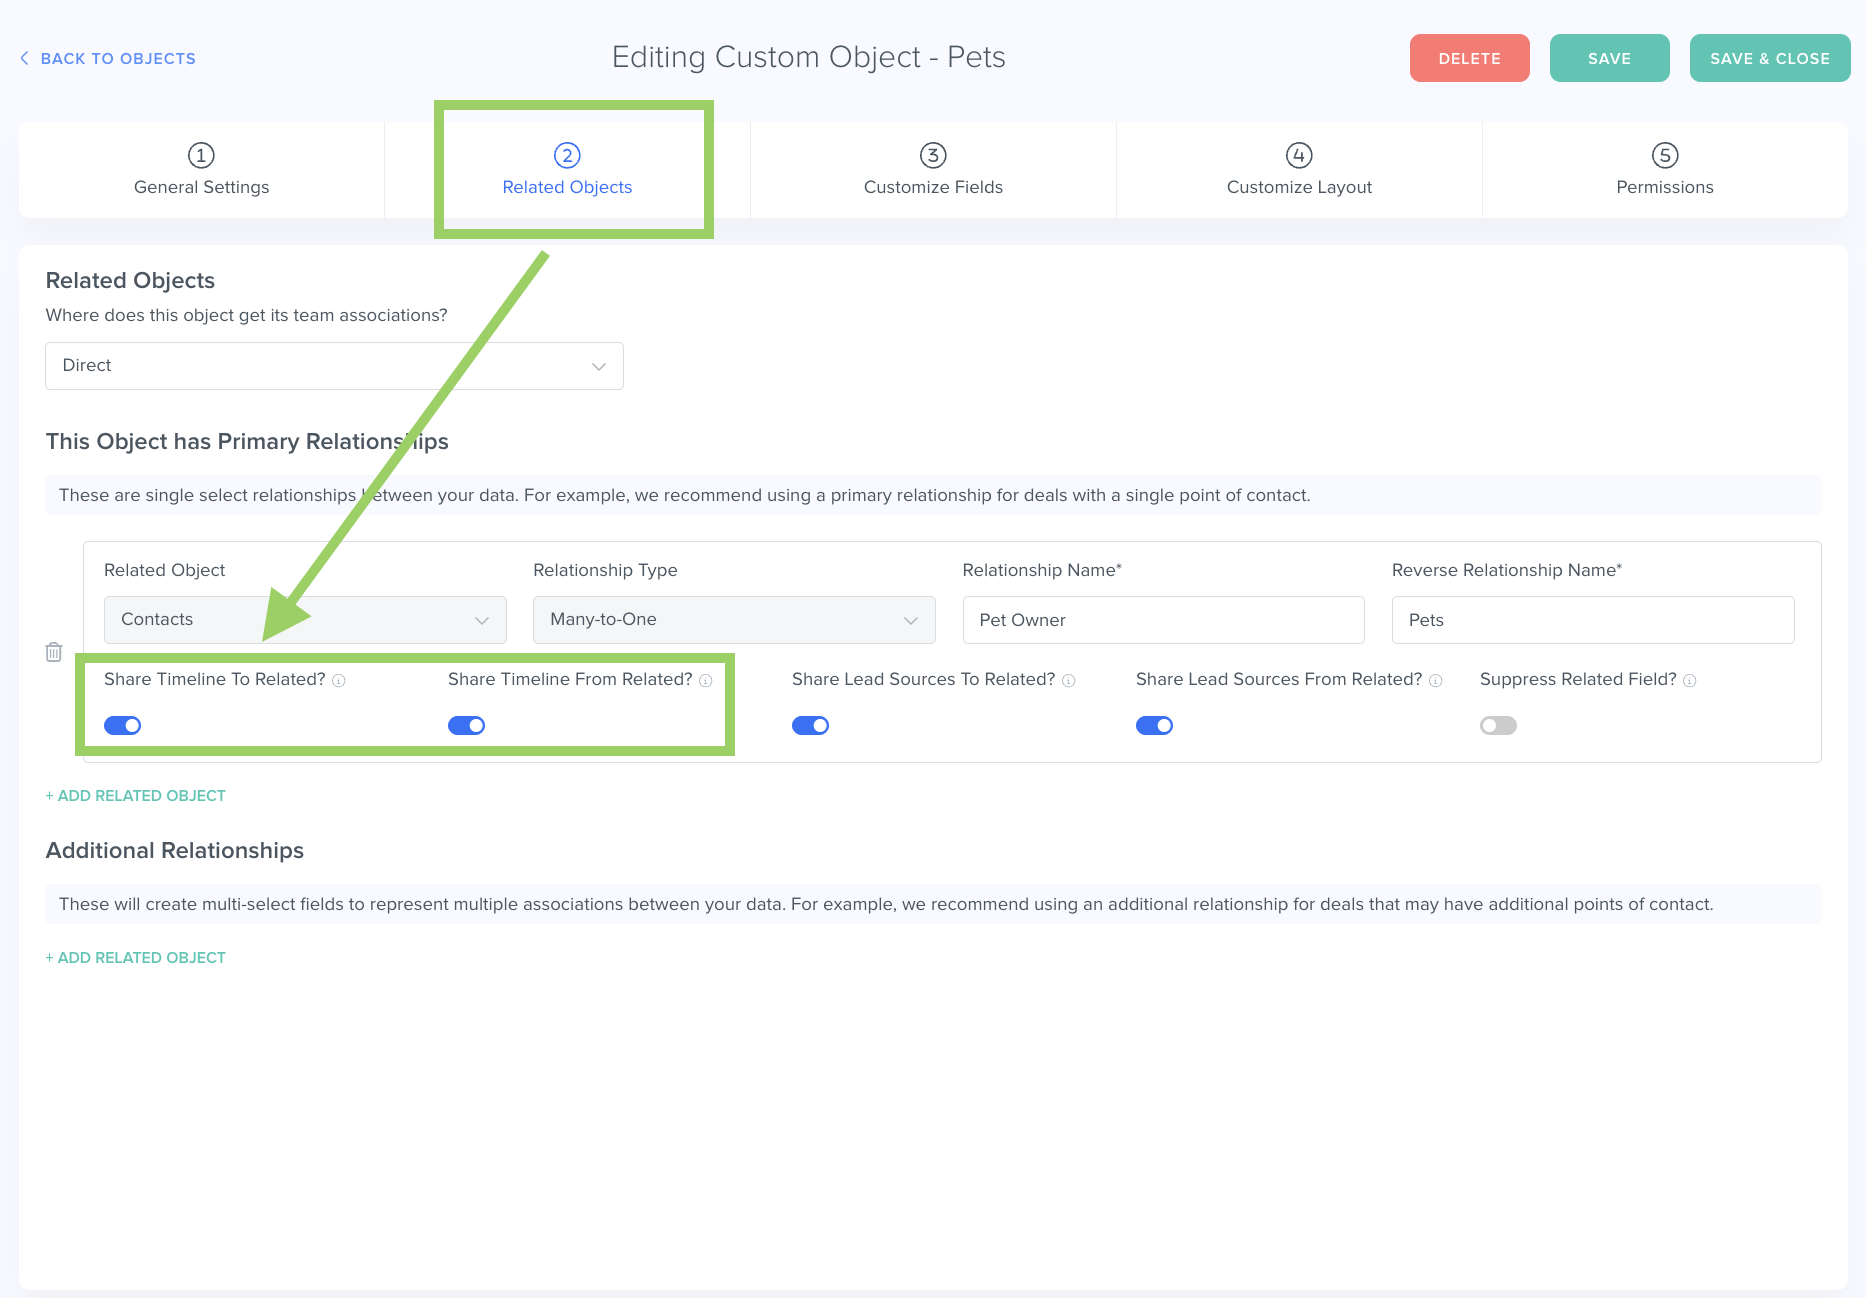
"Share Timeline To Related" will share the Custom Object's timeline to a related Contact's Timeline, whereas "Share Timeline From Related" will pull in the related Contact's Timeline to the Custom Object's Timeline. - Click the green "Save" button on the upper right hand corner to save these changes.
What's Next?
Now that you've read through this guide, you can check out these related articles:
- How to Manage Your Activity Dashboard
- Getting Started: What is An Activity?
- Integrated Inbox Overview: Connect Your Email Account to Send and Track Emails
Need Help?
If you encounter any issues, reach out to us at support@kizen.com.
Was this article helpful?
That’s Great!
Thank you for your feedback
Sorry! We couldn't be helpful
Thank you for your feedback
Feedback sent
We appreciate your effort and will try to fix the article