Difficulty: Intermediate

Purpose: This step-by-step guide will walk you through how to customize your Contacts Record Layout to best fit your day-to-day needs for your Agent CRM.
TABLE OF CONTENTS
- What Is A Contact Record Layout?
- Prerequisites
- How to Create a Custom Record Layout for your Contacts
- Related Articles
- Still Need Help?
What Is A Contact Record Layout?
The Agent CRM comes with pre-loaded record layout templates that are designed specifically for your insurance agent needs. For example, the Contact Record Layout display your most relevant fields and related objects such as Enrollments and Policies, as well as action buttons to trigger pre-built Agentic Workflows and integrations with a single click.
However, we understand you may prefer to interact differently with your Agent CRM, so we made these record layouts fully customizable!
Prerequisites
Before proceeding, make sure you have already completed the following:
✅ Complete all steps in the Agent CRM: Getting Started guide.
✅ Review the Agent CRM: "Contacts" Object.
✅ Add any relevant Custom Fields to your Contacts fields.
How to Create a Custom Record Layout for your Contacts
Step 1: Add a New Record Layout
- Click on "Data" in the top menu bar > "Contacts."

- On the Contacts page, click on the gear icon on the upper right and select "Object Settings" in the dropdown menu.

- Click on "4. Customize Layout" > "Record Layout"
- Click on either "Manage Record Layouts" to duplicate the pre-built Contacts Template and customize it to your preferences, or "Add Record Layout" to create a completely new record layout from scratch.

⚠️ Attention: Make sure you do not edit the pre-built Contacts Template directly, as your FMO may push out updates to the Agent CRM and overwrite your customizations.

If you would like to use the Contacts Template as a starting point (this is useful to duplicate the action buttons to trigger the Agentic Workflow and integrations), we recommend duplicating the existing layout. To duplicate a record layout:

1. Click on "Manage Record Layouts" > Click on the three dots on the left.

2. Click on "Duplicate" and give the record layout a unique name to differentiate it from the pre-built Contacts Template.

Step 2: Customize Your New Record Layout
Once you create your new record layout, you'll see the menu to add and rearrange your layout components on the left. On the right, you'll see the Record preview to see what your final layout will look like.
Tip: Rows are the sections where your components will appear in. Components can be Fields, Timelines, Fields, Action Blocks, etc.
- To add a component to a row:
- Click on "Add a Layout Component."
- Select and customize the component you want to add.
- Click the green "Save" button in the bottom right to add the component to your layout.

- Click on "Add a Layout Component."
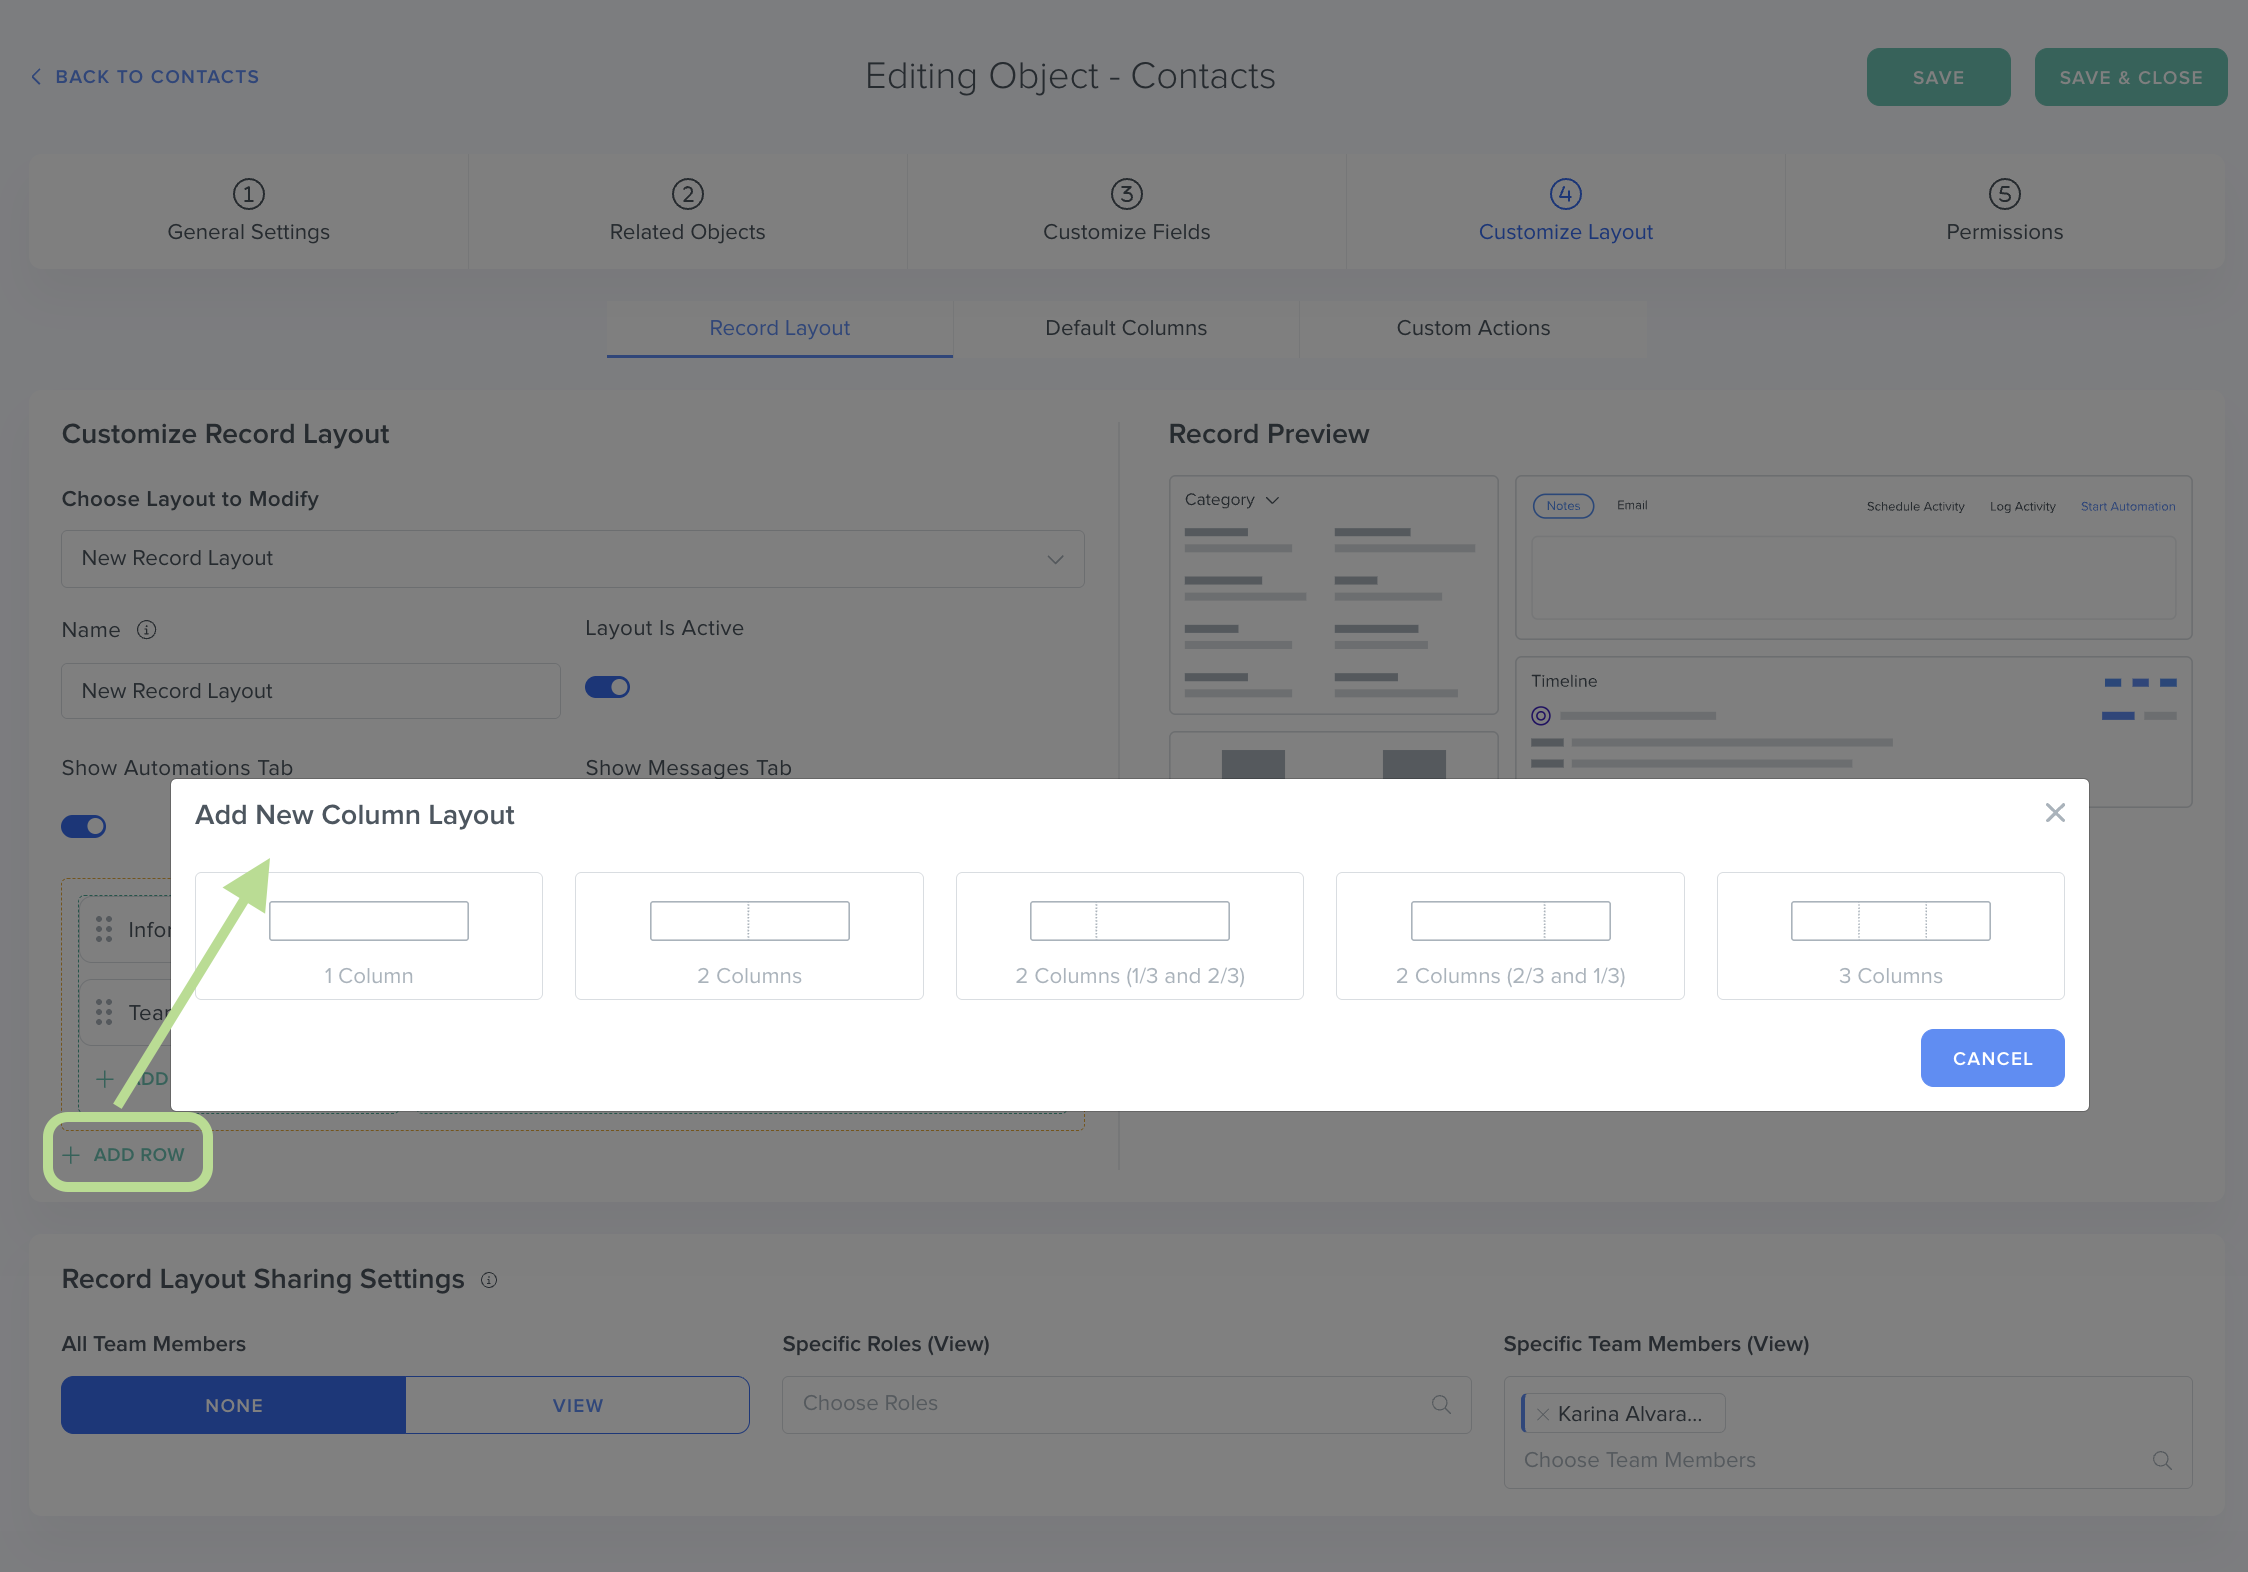
- To add a new row to your record layout:
- Click on the green "Add Row" text below the previous row.
- Select how many columns you want within the row.
- Click "Save."
- Click on the green "Add Row" text below the previous row.
- Click the "Save & Close" button in the upper right corner.
Step 3: Test Your Record Layout!
- To test your new record layout, click on "Data" in the top menu bar > "Contacts" > Select any Contact.
- Click into the "View" menu > Click on your new Record Layout to see your hard work!

Related Articles
- How to Edit Default Columns in the Table View
- How do I edit a Custom Field?
- View Layout Options for Contacts / Custom Objects
Still Need Help?
- If you encounter any issues, contact support@kizen.com
Was this article helpful?
That’s Great!
Thank you for your feedback
Sorry! We couldn't be helpful
Thank you for your feedback
Feedback sent
We appreciate your effort and will try to fix the article