Difficulty: Intermediate

Purpose: This step-by-step guide will walk you through how to create a custom email in Kizen.
TABLE OF CONTENTS
- What is the Email Builder?
- Prerequisites
- How to Create a Custom Email
- Make Sure Everything Looks Good!
- Related Articles
- Still Need Help?
What is the Email Builder?
The email builder in Kizen allows you to create custom emails to send to your Contacts. You can use the builder to create beautiful birthday messages, reminders to clients, marketing emails, and more!
For this tutorial, we'll be using a birthday email as our use case.
Prerequisites
Before you get started, make sure that you have added a business logo and connected your business inbox to Kizen.
✅ Integrated Inbox Overview: Connect Your Email Account to Send and Track Emails
How to Create a Custom Email
Step 1: Create a New Email Template
- Click on "Platform" in the top menu bar > "Library"

- Click on the green "New Template" button.

A default Email template will open up in the builder, preloaded with your business logo and your business colors.
Step 2: Select your Integrated Inbox and Select a Subject Line
- Click on the field "Sender Type" and either select your "Business Default" email (found in the Business Settings) or "Integrated Inbox" for additional email addresses that may be different from your Business Default.
- Add a "Subject Line" — this will be the subject line of the email that the Contact receives.

- Click on "Internal Name" to name your email template. If you choose to skip this step, the internal name will default to the subject line. However, we recommend selecting an internal name that will be easy for you to search for and identify in your email templates in the future.
Step 3: Customize Your Email Body
The Kizen email builder functions as a set of building blocks per section. You can use the existing template blocks to insert images and text, or you can delete the existing blocks and start from scratch.
To create an email from scratch, drag and drop the elements from the menu pane on the right side of your screen to the email body.
- First, click on the "Section" block and drag it to your email body.
- Then, click on the "Row" block and drag it to the section you just added.
- In the pop-up menu, select how many content blocks you want to add to the row.
- Next, click on any of the relevant blocks in the "Basic Content Element" section and drag it over to the content blocks in the row. This can be a text box, image, divider, button, or file attachment.

⚠️ Note: You will need to upload images from your computer into Kizen in order to add image content to your email. At this time, images cannot be linked from external websites. For our example use case, we want to drag in a button that will link to our cafe's menu and place a birthday greeting at the very top of the email. Therefore, we'll repeat the process above and then click into the button to link to our external website.

Step 4: Add Some Finishing Touches! (Optional)
To make your email look even more polished and eye-catching, you can add a background color.
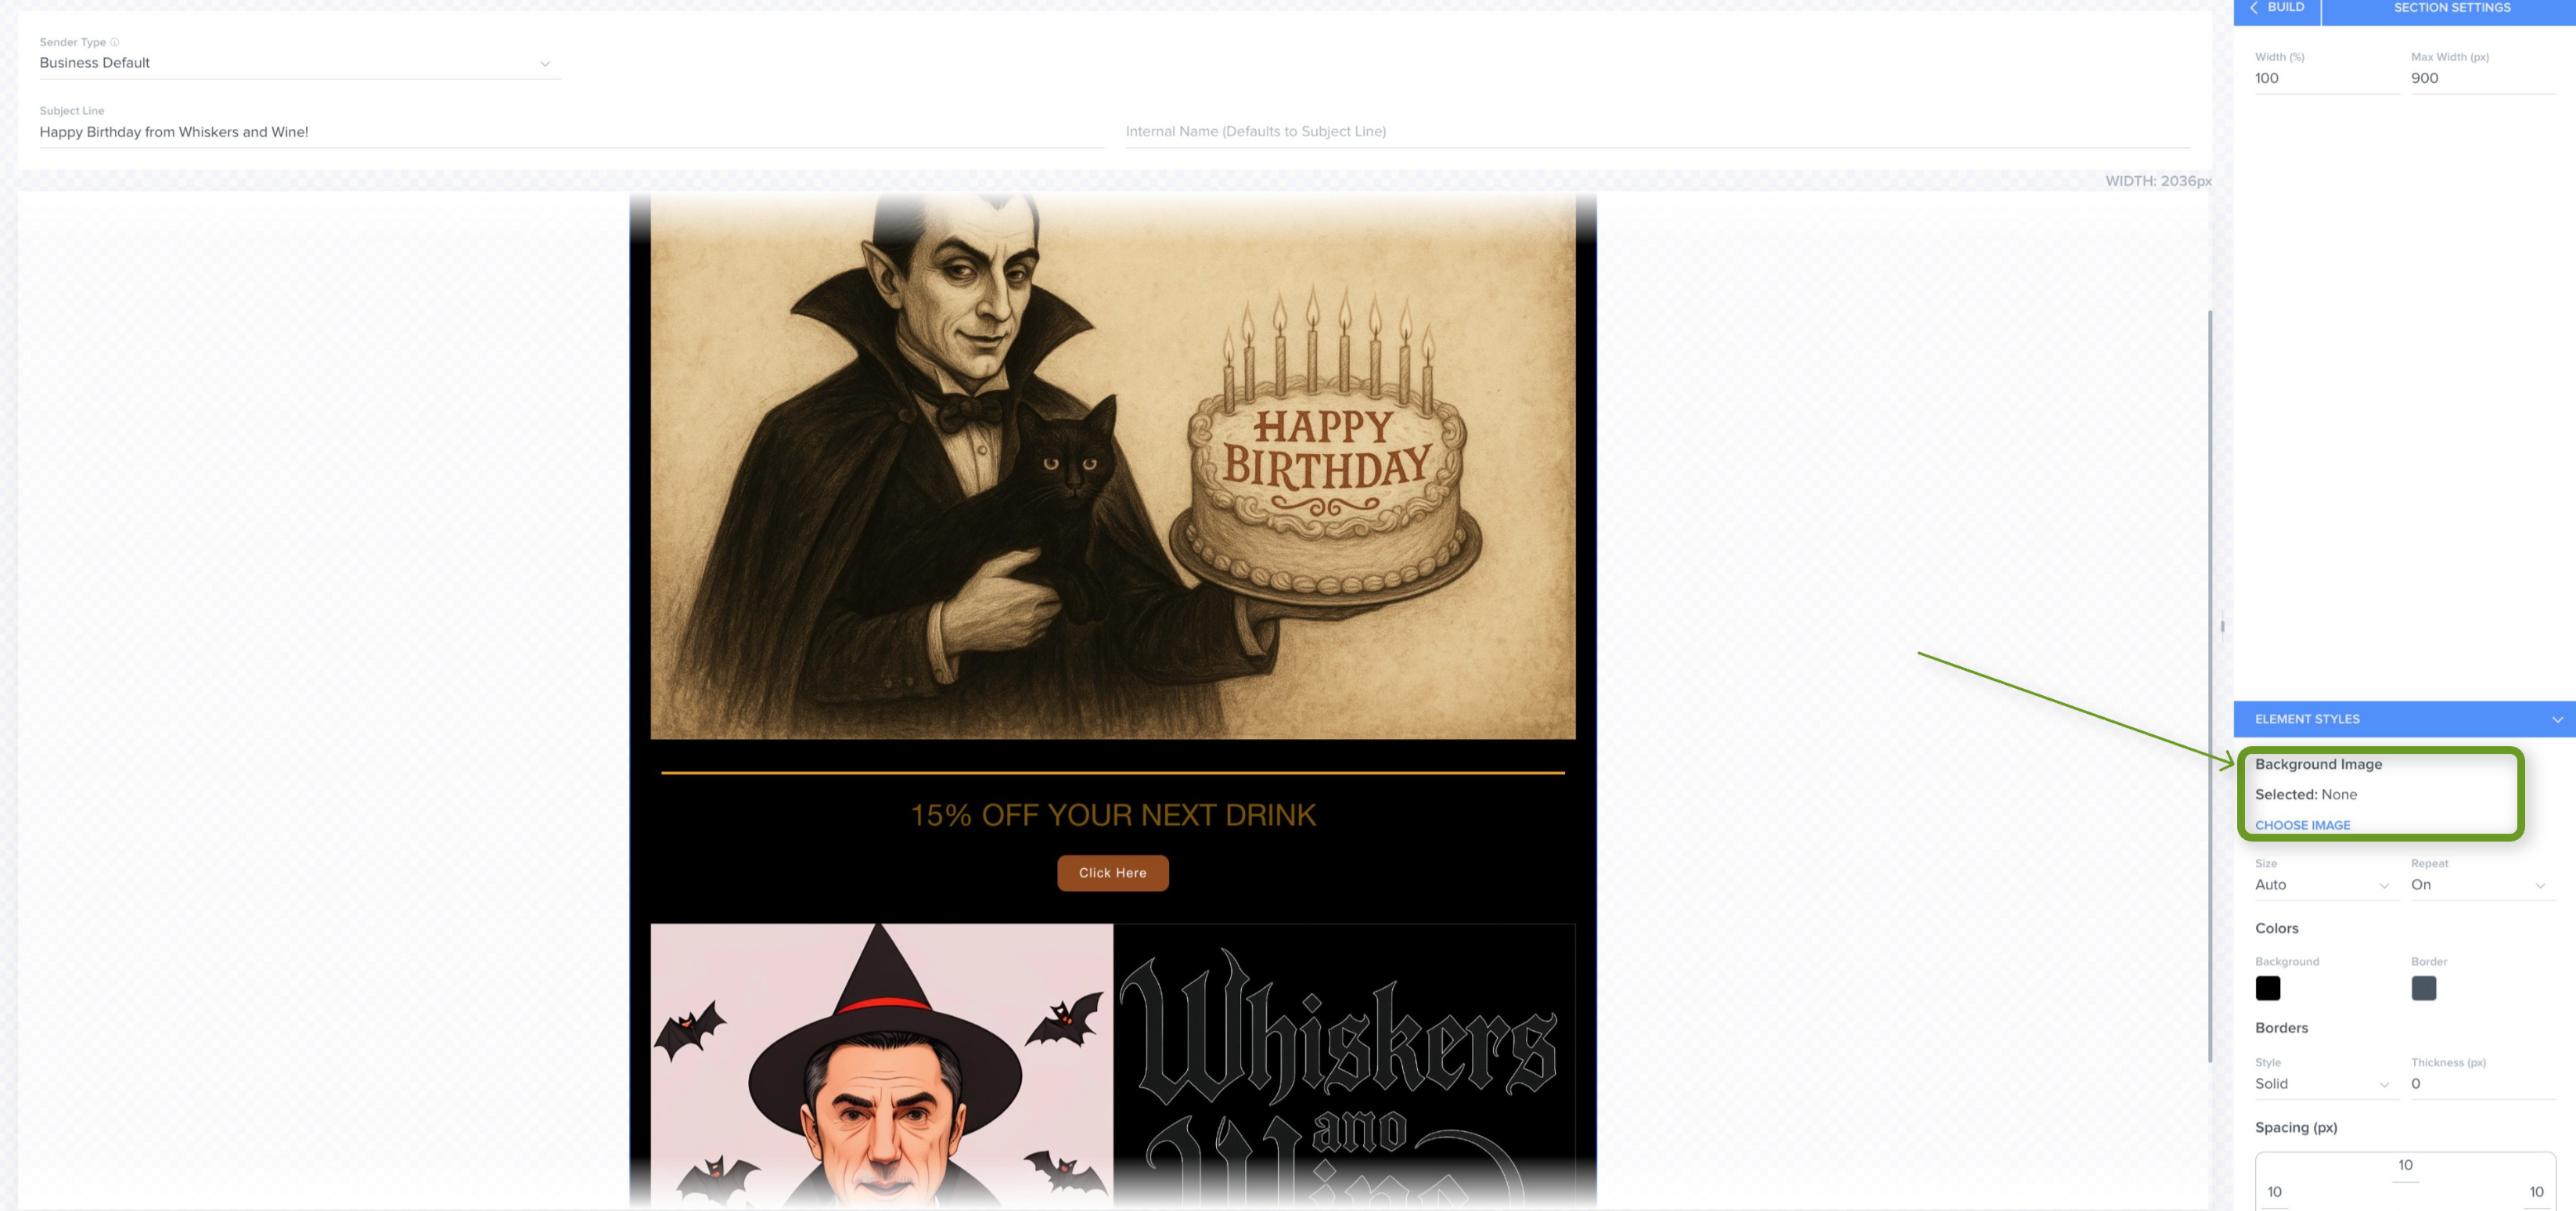
To add a background color or background image to your email:
- Click on the section you want to add a background color to.
- In the right menu pane, under "Element Styles" > "Colors" > "Background," click on the square to select a color.
- OR click on "CHOOSE IMAGE" to make the background an image.
To customize your font:
- Click outside of the body of the email (for example, on the gray checkbox background) — no specific Section or Row should be selected.
- You should see "Page Settings" appear in the right menu pane.
- Click on "Font Face" and "Font Size" to customize how your fonts appear.
Note: If you click directly into your text block and use the small editor that pops up directly on the builder, you will have the option to choose the top five most popular fonts. However, if you click on your section or row and use the "Element Styles" or "Page Settings" section in the right menu pane, you will have access to over a hundred different font styles.
Make Sure Everything Looks Good!
Before sending out your new email to clients, make sure to send yourself a test email so that you can review how the email looks.
- Click on the blue "Send Test Email" button at the top of your window. Enter your email address in the pop-up window.
- Check your inbox. The subject line will read "[Test Email]" and show your email as it would appear to clients.
- Once you are satisfied with those results, click the green "Save & Close" button and admire your work.

⚠️ Note: When sending test emails through the email builder, any merge field values will not appear in the test email.Related Articles
- Using the Kizen Builder
- Email Builder: Dynamic images rules and settings
- Fonts in Email Builder
- Email Templates
Still Need Help?
- If you encounter any issues, contact support@kizen.com and we'll be happy to help out!
Was this article helpful?
That’s Great!
Thank you for your feedback
Sorry! We couldn't be helpful
Thank you for your feedback
Feedback sent
We appreciate your effort and will try to fix the article