Purpose: Learn how to edit, delete, or hide an existing Custom Field. Whether you want to change your field names, add more field options, or delete fields altogether, this step-by-step guide will help you ensure your data structure remains relevant and tailored for your specific business needs in Kizen.
TABLE OF CONTENTS
Prerequisites
Before editing a Custom Field, make sure you have completed the following set-up tasks:
✅ Review all of the existing fields in your Contacts object or Custom Object. We recommend double-checking the names and purpose of each and every field in order to ensure you avoid duplicate fields and you do not change or delete any critical data.
✅ Add any Custom Fields that are missing.
✅ Review the different Custom Field Types to ensure you're utilizing the correct field type for your specific data.
⚠️ Note: Depending on your set-up, there may be existing fields that are configured to work specifically with Agentic Workflows and Integrations. We recommend avoiding deleting fields that came pre-configured in your Kizen account, and avoiding changing the Field API Name for any fields that you did not add yourself.How to Edit, Delete, or Hide a Custom Field
How to Edit a Custom Field
- Select "Data" > "Contacts" or "Custom Objects" in the top toolbar menu. If you are adding new fields to a Custom Object, select the relevant Custom Object.
- Select the gear icon in the top right and click on "Customize Fields."

- Select the "..." menu to the right of the field name > "Edit Options":
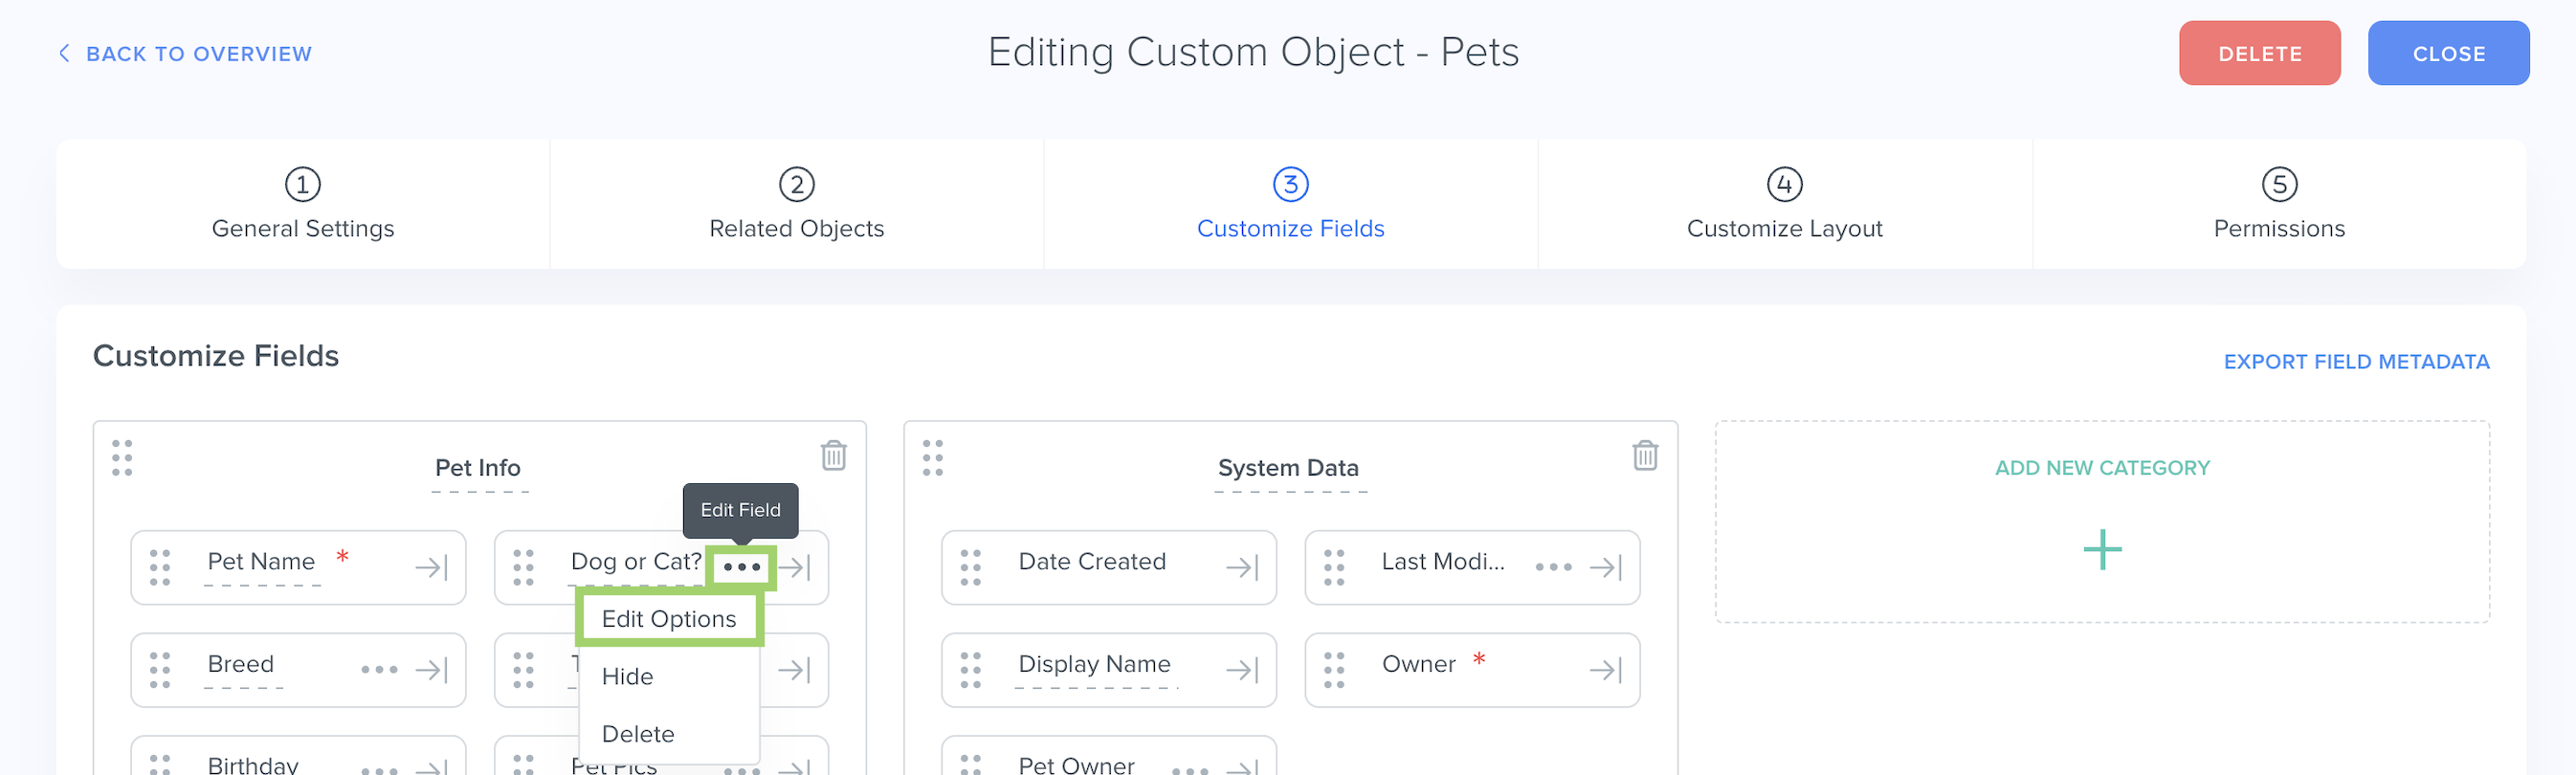
- In the pop-up window, you can change the Field Name, the Category where the field currently lives, and the Description (which is useful to describe the purpose and functionality of the field).
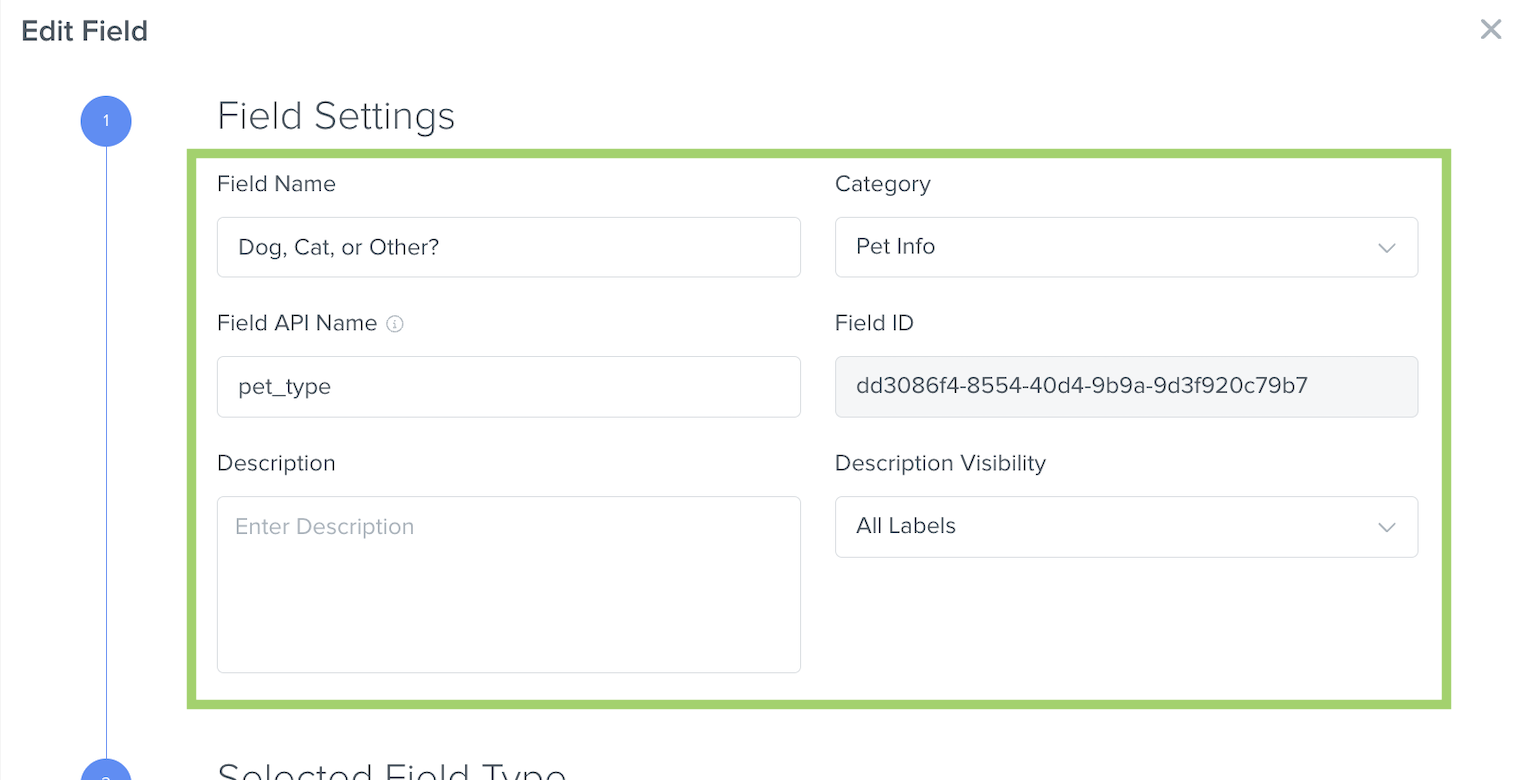
(As mentioned above, we recommend keeping the Field API Name as is for fields that came pre-configured in your Kizen account. However, if you would like to edit the API name for your Custom Field that you created yourself, you can certainly do so and refer to our API documentation for additional guidance.) - To edit existing field configuration, such as Dropdown field values, scroll down to the "Field Options" section. You can click on the trash bin icon to delete field options or click on "Add Option" to add more field options.
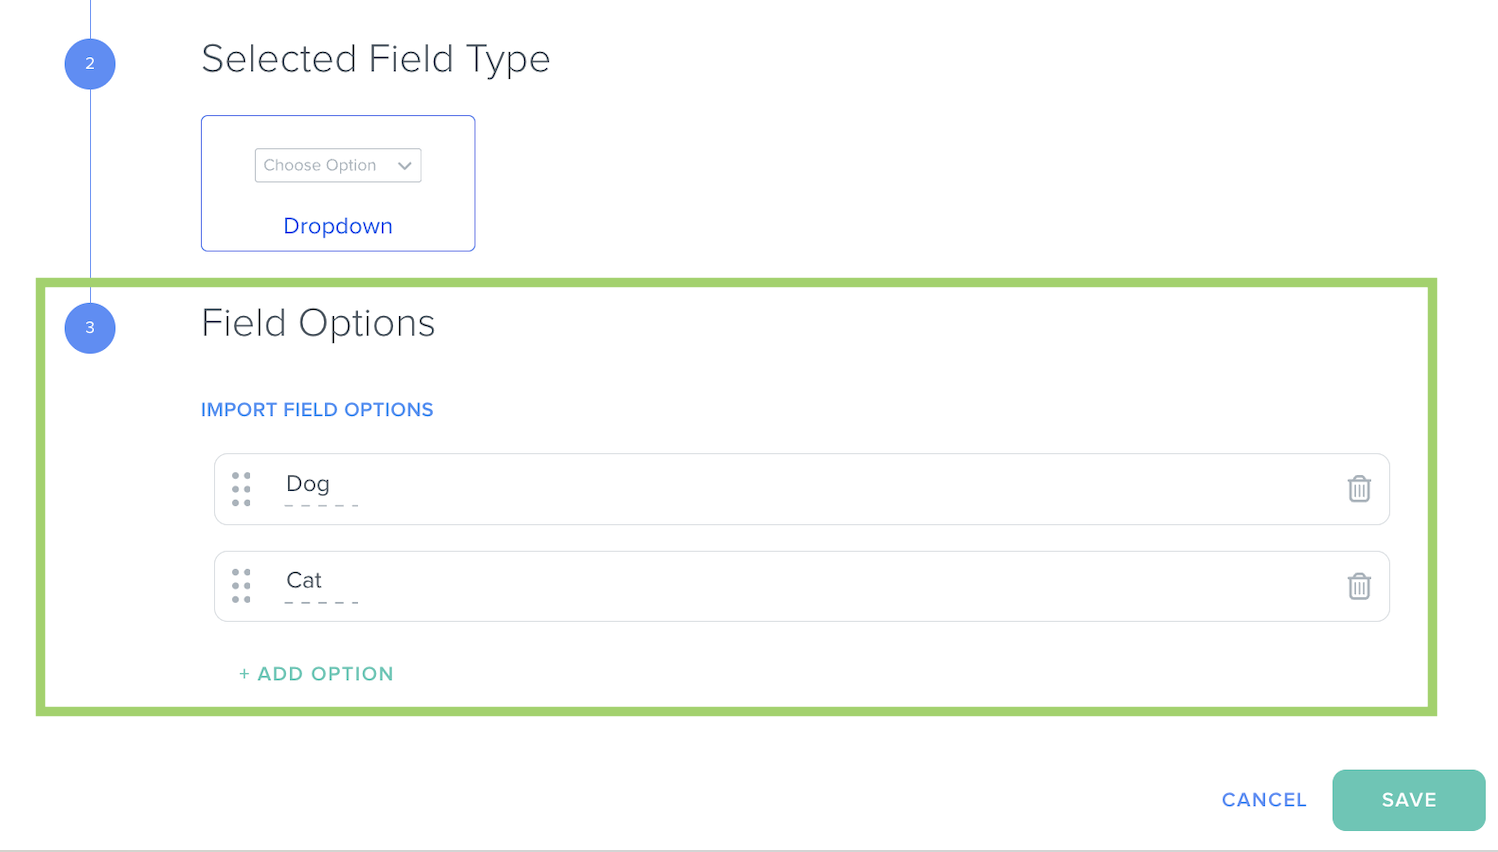
- Click on the "Save" button in the bottom right.
⚠️ Note: At this time, it is not possible to change the field type of an existing field. As a workaround, you can create a new Custom Field with the desired field type, export your object records to csv file, re-import the object records to the new Custom Field type, and then delete the old Custom Field.How to Delete a Custom Field
You may want to delete a Custom Field if it's no longer relevant or appropriate for your business workflow.
- To delete a Custom Field, select the "..." menu to the right of the field name > "Delete":
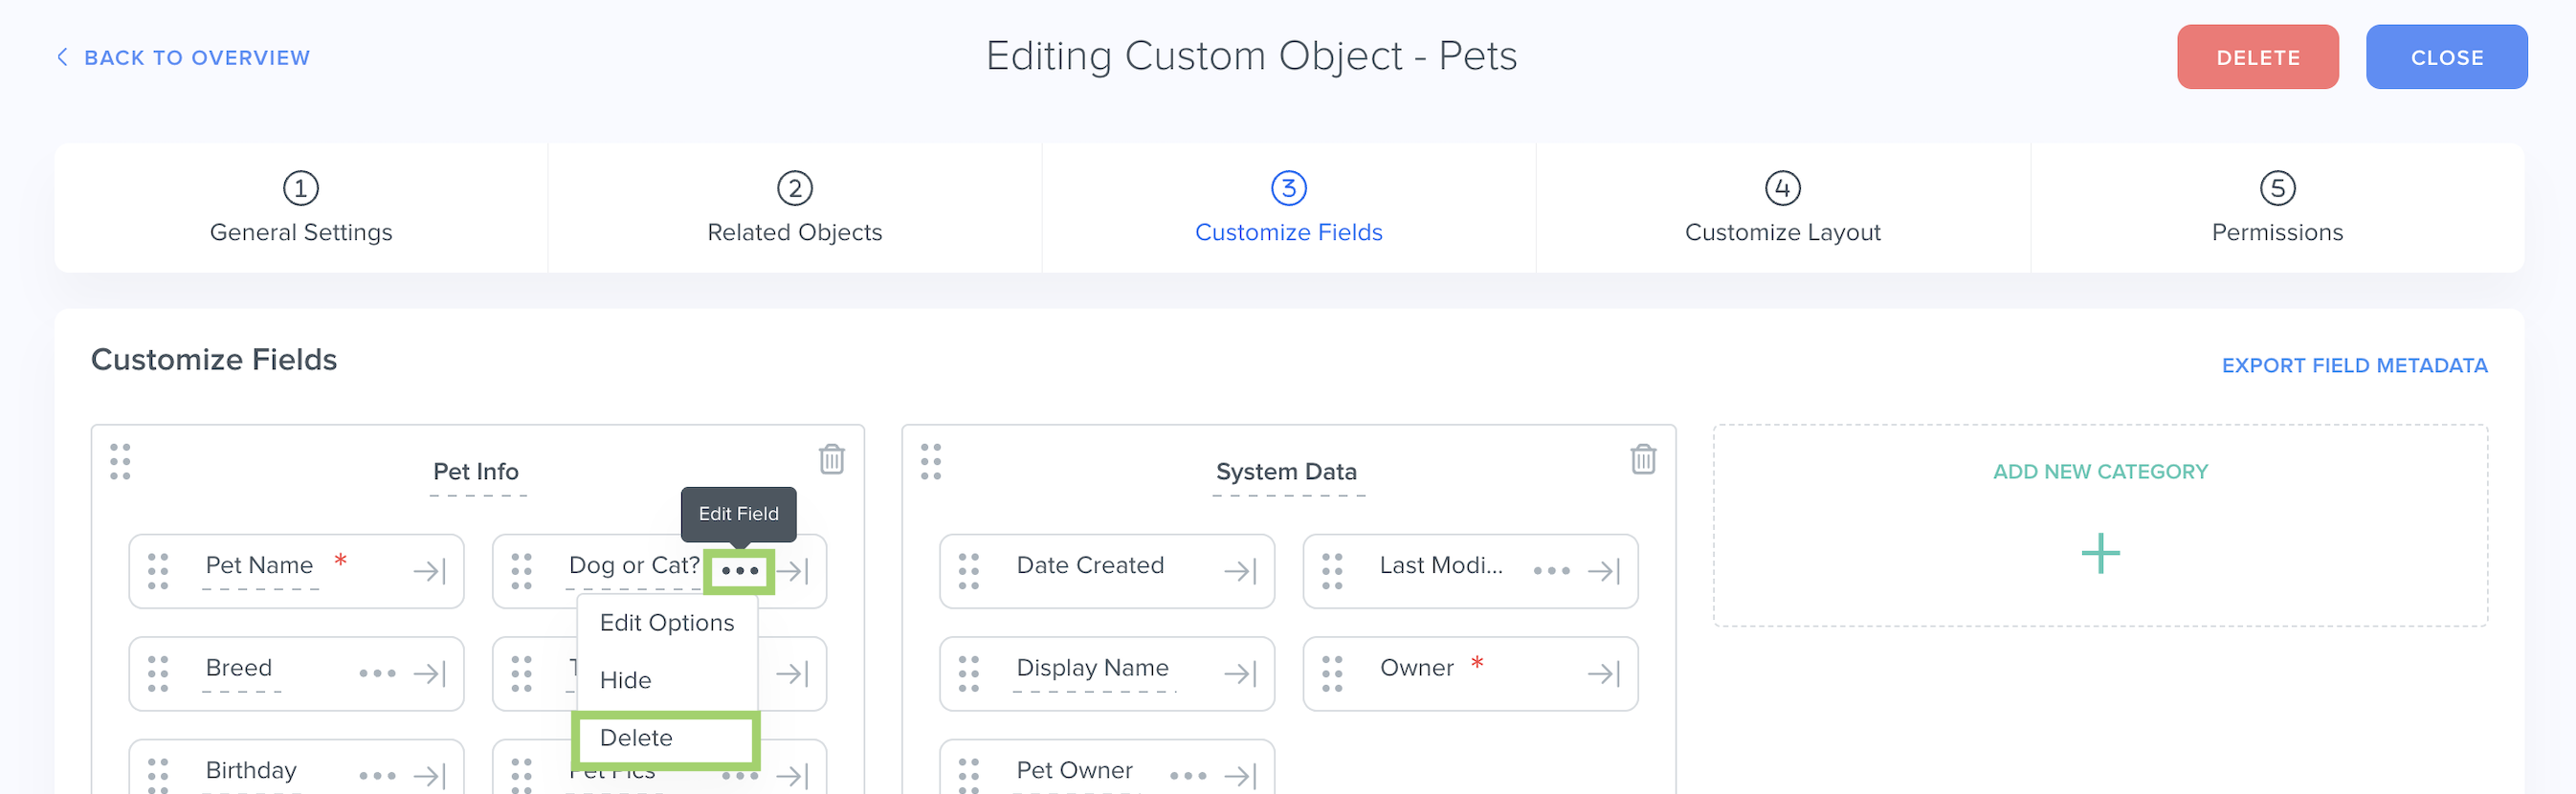
- In the pop-up window, select "Confirm Delete."
⚠️ Note: Deleting fields cannot be reversed at this time. Once you permanently delete a field, it cannot be restored or undone.How to Hide a Custom Field
There may be scenarios where you do not want to delete a field entirely, but you would like to hide it from the object record page.
For example, you may want to hide a field that is no longer relevant and used, but it holds historic data. Or you may want to hide a field that you only use for Agentic Workflow purposes and you don't need the rest of your team to see or interact with it.
- To hide a Custom Field, select the "..." menu to the right of the field name > "Hide":
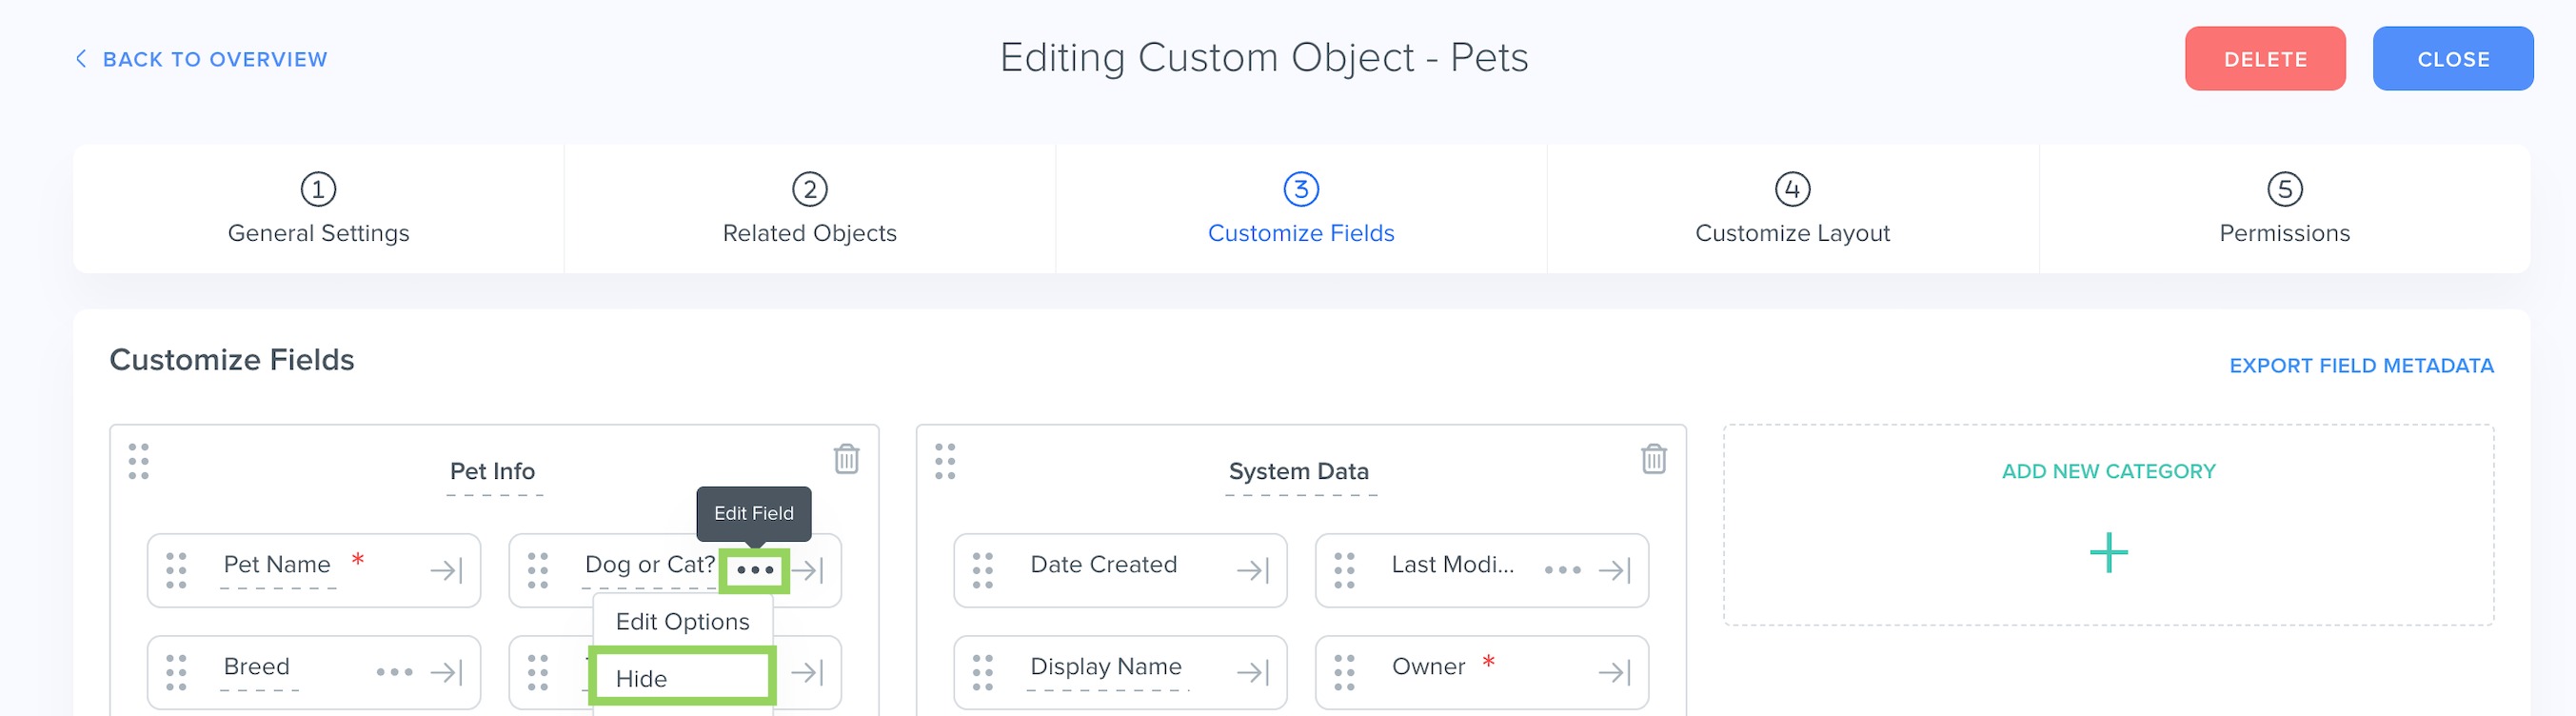
- In the pop-up window, click on "Confirm." Once the field is hidden, it will turn gray and move to the bottom of the Category.
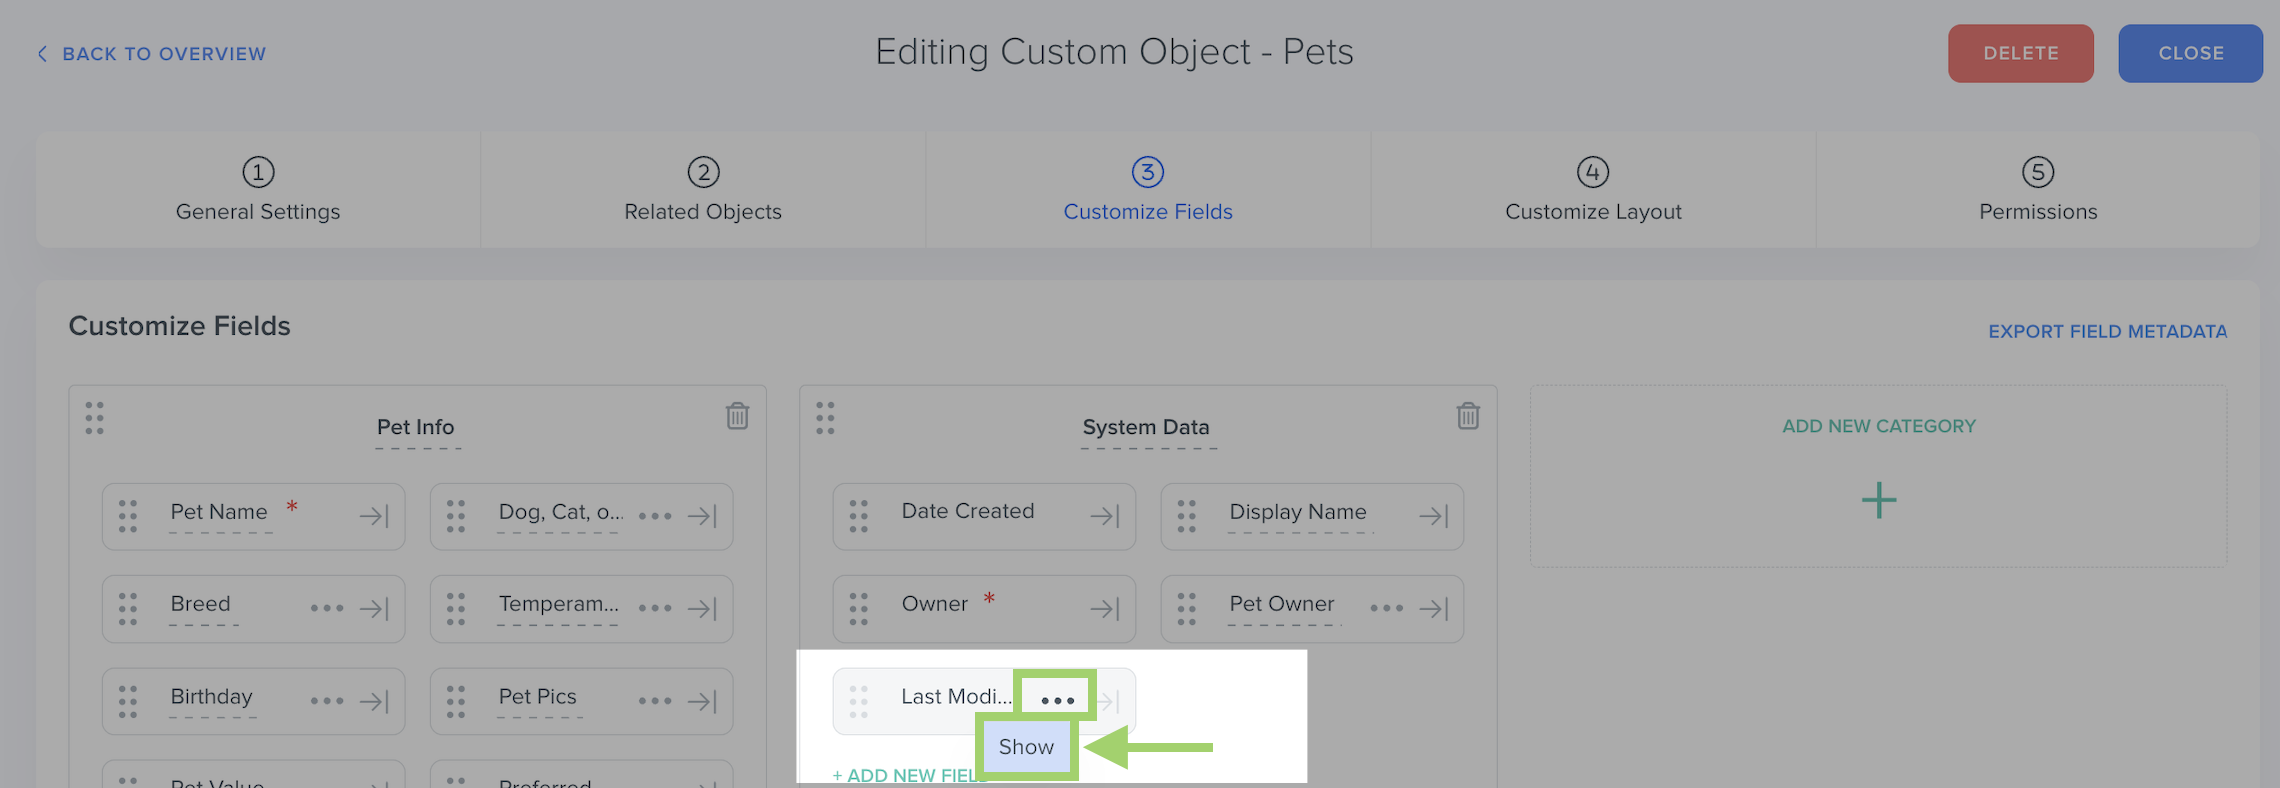
- To unhide a Custom Field, click on the "..." menu to the right of the field name > "Show":
⚠️ Note: Hiding a field will prevent the field from showing in object record layouts, Table View, Board View, or Timeline field updates. However, it will remain visible in Agentic Workflows, Filters, Charts, and Dashboards.Was this article helpful?
That’s Great!
Thank you for your feedback
Sorry! We couldn't be helpful
Thank you for your feedback
Feedback sent
We appreciate your effort and will try to fix the article