Difficulty: Beginner

Purpose: This step-by-step guide will walk you through how to schedule Activities for future due dates and how to set up email and text reminders for them.
TABLE OF CONTENTS
- What are Scheduled Activities?
- Prerequisites
- How to Schedule an Activity
- How to Confirm Your Scheduled Activities
- Related Articles
- Still Need Help?
What are Scheduled Activities?
Kizen's Scheduled Activities are a powerful way to create and track tasks and client interactions. By scheduling a pre-configured Activity for a future date and time, you and your team can stay on top of your business needs, increasing efficiency and accountability. You can even set reminders before the Scheduled Activity to ensure nothing falls through the cracks!
Tip: You can easily schedule an Activity from three different places: from the Activity Dashboard, a Contact Record, or an Agentic Workflow.
Prerequisites
Before learning how to create Scheduled Activities, your data should be set up in your account, and you should be familiar with what an Activity is, and how to create an Activity.
✅ How to Add a Custom Object in Kizen
✅ Getting Started with Activities: What is An Activity?
✅ How to Create a Custom Activity
How to Schedule an Activity
For our example use case, we'll use Scheduled Activities to set up appointments and reminders for a pet grooming business.
- Navigate to either your Dashboard, Contact Record, or Agentic Workflow:
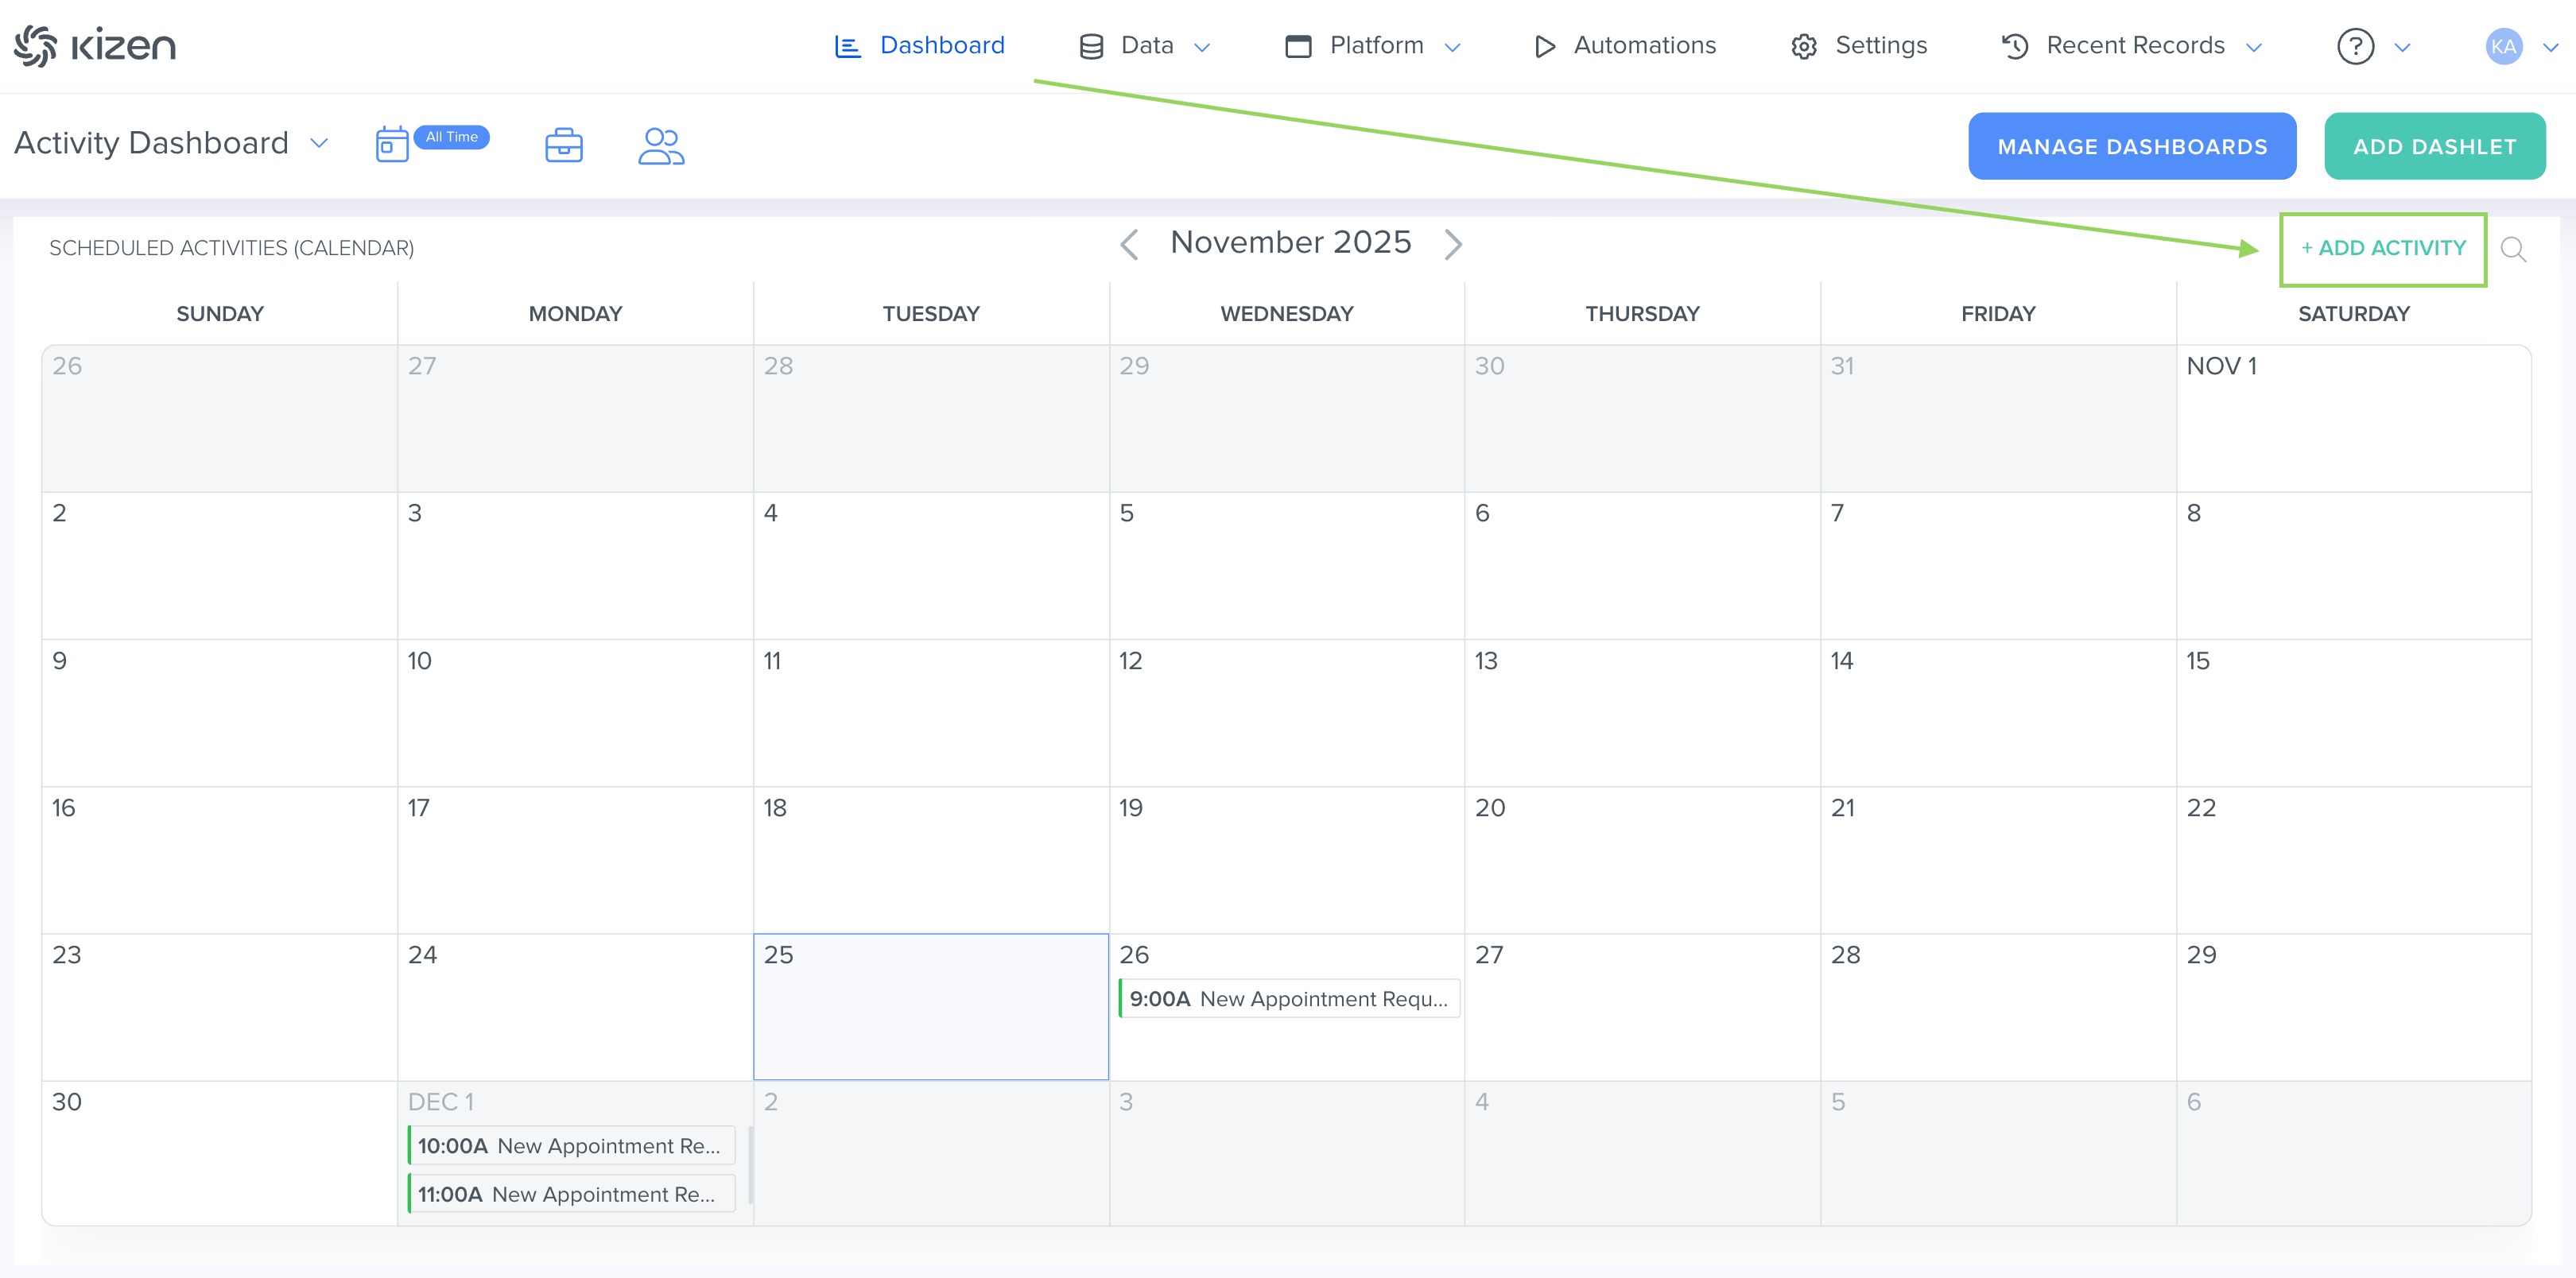
- From Your Activity Dashboard: Click on "Dashboard" in the top menu bar, and in your Activity Dashboard, click on the "Add Activity" button in the top right corner of your Scheduled Activity Dashlet.
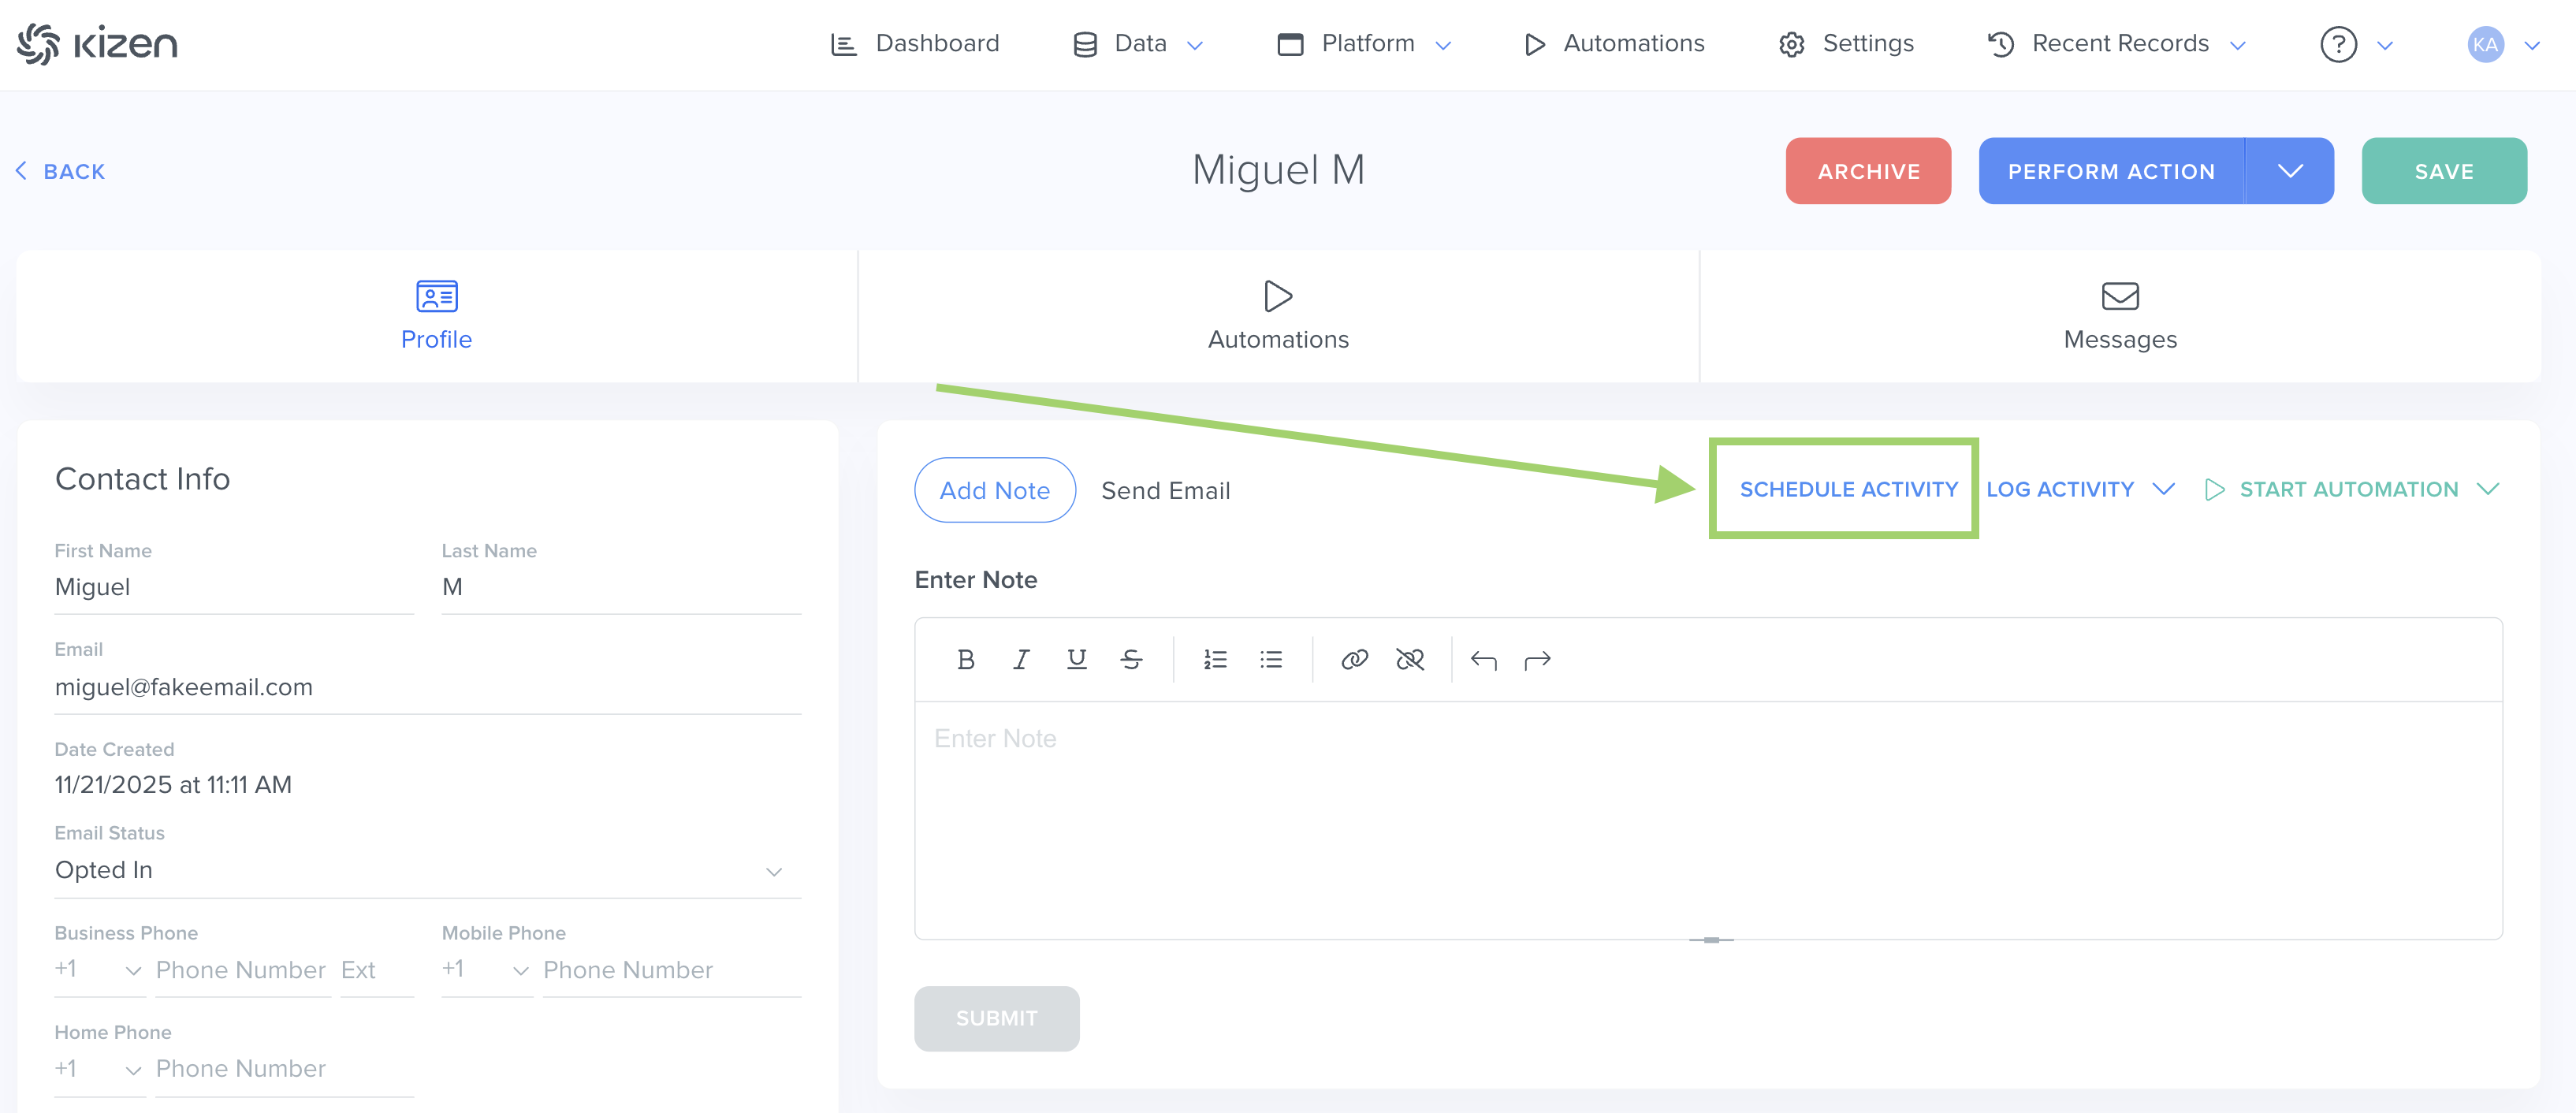
- From a Contact Record: Click on "Data" in the top menu bar > "Contacts." Click on the Contact you want to schedule an Activity for and in the Action block, click on "Schedule Activity" in the top right corner.
- From an Agentic Workflow: Once you've created an Agentic Workflow, drag the "Action" block to your Agentic Workflow or click on the plus sign to add an "Action." When the window appears, click on "Schedule Activity."

- From Your Activity Dashboard: Click on "Dashboard" in the top menu bar, and in your Activity Dashboard, click on the "Add Activity" button in the top right corner of your Scheduled Activity Dashlet.
- When the Activity builder pops up, click "Choose Activity" and click on the Activity you want to add from the drop-down.
⚠️ Attention: Make sure you have already set up Activities before this step or you will only see the default "Notes" Activity. - Choose a team member to assign to the Activity. This is the team member who will receive the notification for the Scheduled Activity and will be expected to complete the task. For our pet appointment example, we might be assigning the client's preferred staff member to groom the pet, walk the dog, feed the cat, etc.
- Next, click on the "Due Date & Time" field to select when the team member must complete the Activity by.
- Add any relevant notes to the Notes field. For our pet appointment example case, we'll fill in some key details that the staff member will need to know when a pet is dropped off.

- Complete the "Set Associations" section.
- If you began on the Contacts page, this will already be pre-filled. However, if you started from the Dashboard or within an Agentic Workflow, you’ll need to manually select the contact the appointment is for, as well as the Custom Object associated with that contact.
- If you began on the Contacts page, this will already be pre-filled. However, if you started from the Dashboard or within an Agentic Workflow, you’ll need to manually select the contact the appointment is for, as well as the Custom Object associated with that contact.
- Add a notification to alert the team member assigned to the activity:
- Click on "+Add Notification."
- Select whether you want to notify via email or text.
- Select how many minutes, hours, or days before the Activity the team member should be notified.
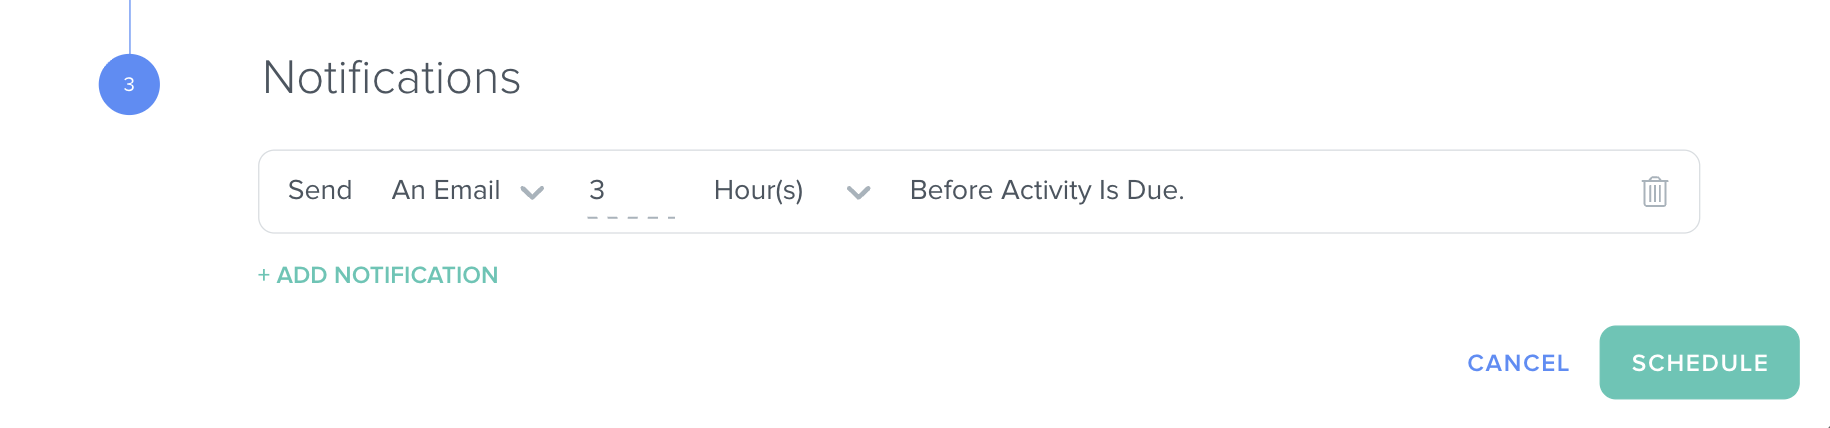
- Click the green "Schedule" button at the bottom right to save and schedule the Activity.
How to Confirm Your Scheduled Activities
To confirm you scheduled your Activity correctly, check your Activity Dashboard.
- Click on "Dashboard" in the top menu bar. If the Scheduled Activities table isn't already added to your Activity Dashboard:
- Click on the green "Add Dashlet" button in the top right corner.

- In the pop-up window, click on "Activities" > "Report Type" and then choose either "Scheduled Activities (Calendar)" or "Scheduled Activities (Table)."
- Choose what specific Activity to display or leave blank for all.
- Click on the green "Add Dashlet" button in the top right corner.
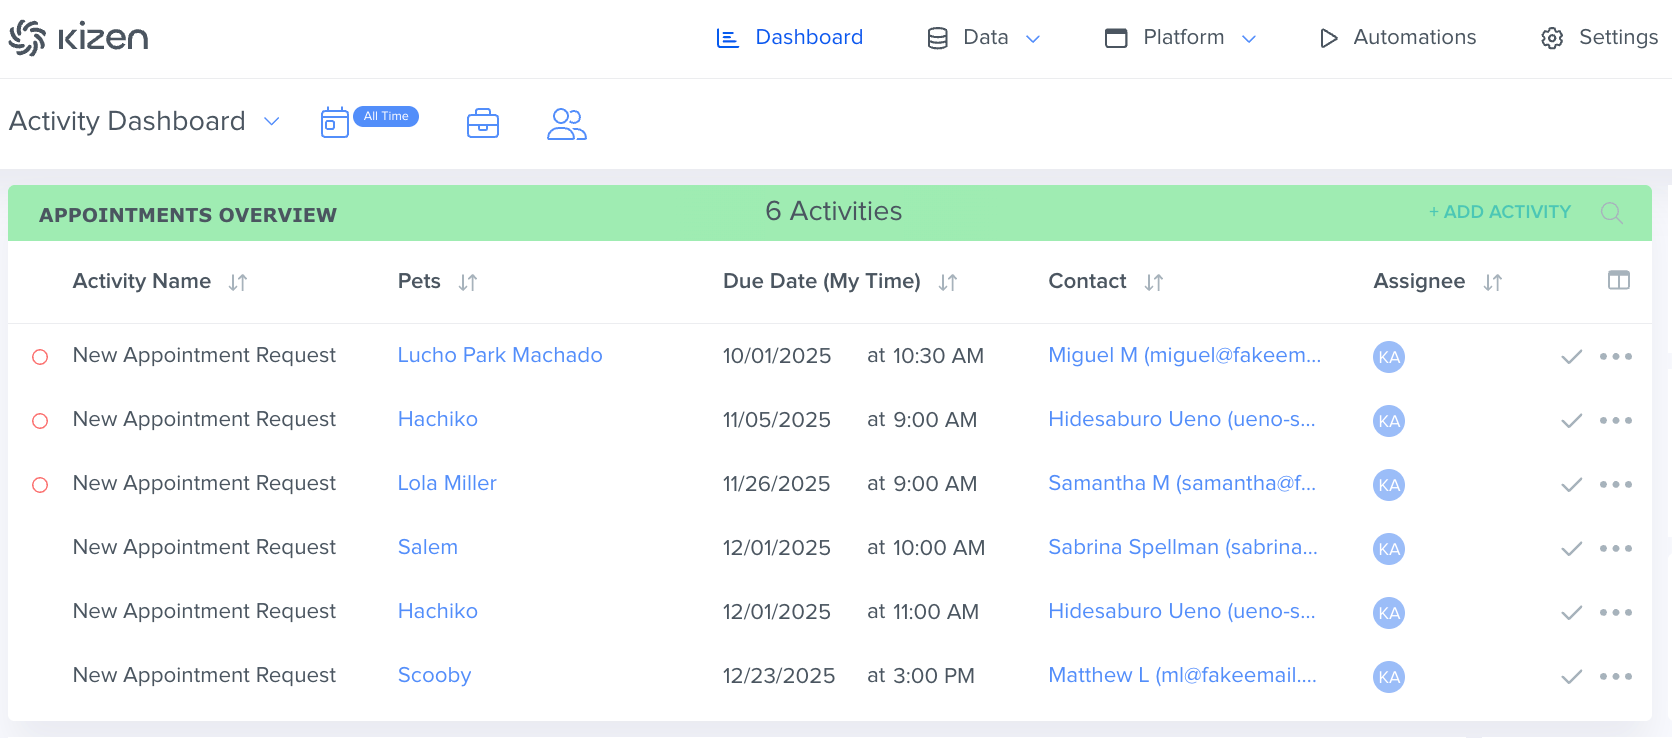
- Now, you can see all of your Scheduled Activities that need to be completed. Any past due activities that have not been completed will have a red circle to the left of the Activity Name.
- Now that you've scheduled an Activity, learn how to complete an Activity!
Related Articles
- How to Manage Your Activity Dashboard
- How to Filter by Scheduled Or Completed Activities
- How to Create a Custom Activity
Still Need Help?
- If you encounter any issues, contact support@kizen.com.
Was this article helpful?
That’s Great!
Thank you for your feedback
Sorry! We couldn't be helpful
Thank you for your feedback
Feedback sent
We appreciate your effort and will try to fix the article