Purpose: Learn how to filter Contacts and how to filter Custom Object records to quickly find the data you need based on fields, interactions, activities, and connections to related objects.
TABLE OF CONTENTS
- Overview
- How To Filter Your Contacts & Custom Object Records
- Example Use Cases
- Related Articles
- Still Need Help?
Overview
Kizen's powerful filters help you quickly find, extract, and organize your Contacts and Custom Object records, saving you time and effort. You can filter by multiple kinds of criteria, such as specific field values and dates, as well which records have triggered an Agentic Workflow or interacted with a specific team member. Additionally, you can create and save Filter Groups or even add pre-defined Quick Filters for an even more efficient, easy-to-access data.
How To Filter Your Contacts & Custom Object Records
How to Apply Filters
- Click on "Data" in your top toolbar menu > "Contacts" or "Custom Objects" OR "Platform" > "Custom Objects."

- Click on the Custom Object you want to filter.
- Once you are viewing records, click on the filter icon
 , located above the records table.
- Choose your filter type in the dropdown menu and the subsequent filter settings:
- Agentic Workflows: Filter for records where an Agentic Workflow is active, completed, paused on failure, etc.
- Fields: Filter for records with or without specific field values.
- Forms: Filter for records where a form has been submitted.
- Lead Sources: Filter for records based on lead sources (direct traffic, organic search, social, etc.).
- Logged Activities: Filter for records where an Activity was submitted in a specific time period.
- Owner: Filter for records owned by a specific team member.
- Related Objects: Filter for records that have related objects (such as Contacts), and then filter those related objects by specific criteria.
- Scheduled Activities: Filter for records that have outstanding Scheduled Activities for a specific timeframe and team member.
- Surveys: Filter for records where the Contact completed a survey and if they were satisfied or unsatisfied.
- Team Interactions: Filter for records where a specific team member made updates within a specific time frame.
Tip: Select "Equals" for exact matches or "Contains" for partial matches.
- Click the blue "+ ADD FILTER" text to the right of the filter sets if you want additional filters. (Toggle the search logic to "ALL" to search for records that meet both filter requirements, and you will see the search logic change from "OR" to "AND." For either filter requirement, switch to "ANY.")

- Click on the "Apply Filter" button (outlined in blue) to see the results.
- To remove the filter, click on the "Clear All Filters" button (outlined in red) to start over.
How to Create Filter Groups
Filters can also be used to create Groups for your Contacts and Custom Object records. Contact Groups are useful to organize your Contacts based on shared characteristics, such as specific field values. You can then use Contact Groups to send targeted email campaigns, trigger Agentic Workflows, make bulk updates, or export.
For example, lets say we want to group our pet care clients by whether they are dogs or cats to track species-specific needs.
To create a Filter Group:
- Click on the filter icon on the object you want to create a group for.
- Choose the specific filter settings. For our pet spa example, we are filtering for "Fields 'Dog or Cat?' Equals 'Dog.'"
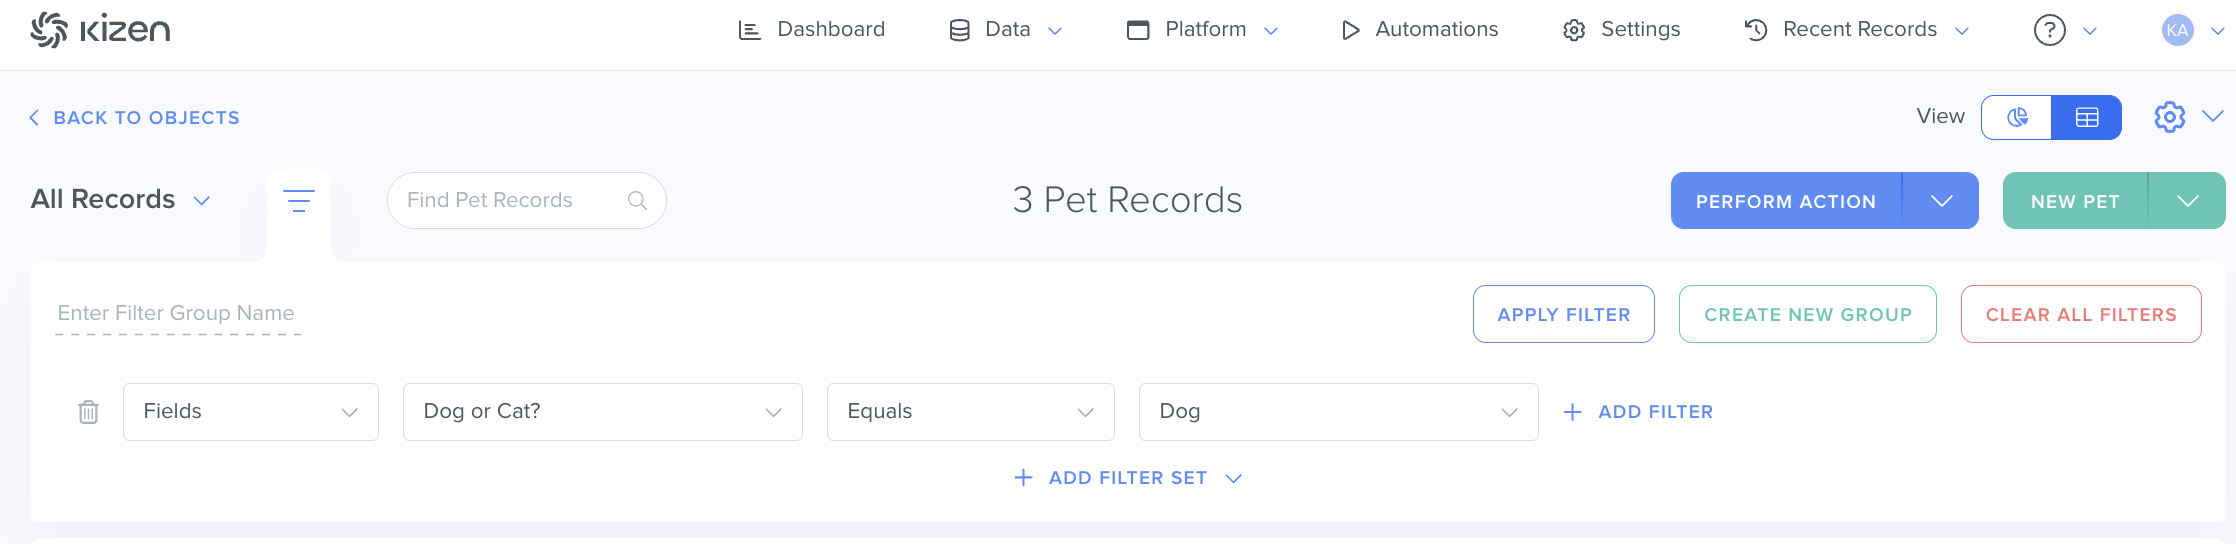
- Click on the "Apply Filter" button to double-check the results.
- Click on the "Create New Group" button (outlined in green).
- In the pop-up window, choose the Filter Group Name and permissions settings for this Filter Group:

- Toggle "Make Private" off to allow other team members in your account to be able to view this Filter Group.
- Choose the default setting for all team members, as well as the setting for specific roles/team members: None (no access at all), View/Use (read-only access), Edit (change filter settings), or Admin (full access, including deletion).
- Toggle "Make Private" off to allow other team members in your account to be able to view this Filter Group.
- Click on the green "Save" button at the bottom right of the window to save your group.
- To view your Filter Groups, click on the down arrow next to "All Records":

- Click on "Manage Filter Groups" in the drop-down menu to modify any permissions or delete an existing Filter Group.

Example Use Cases
Filter Groups for Clients With A Fake Email
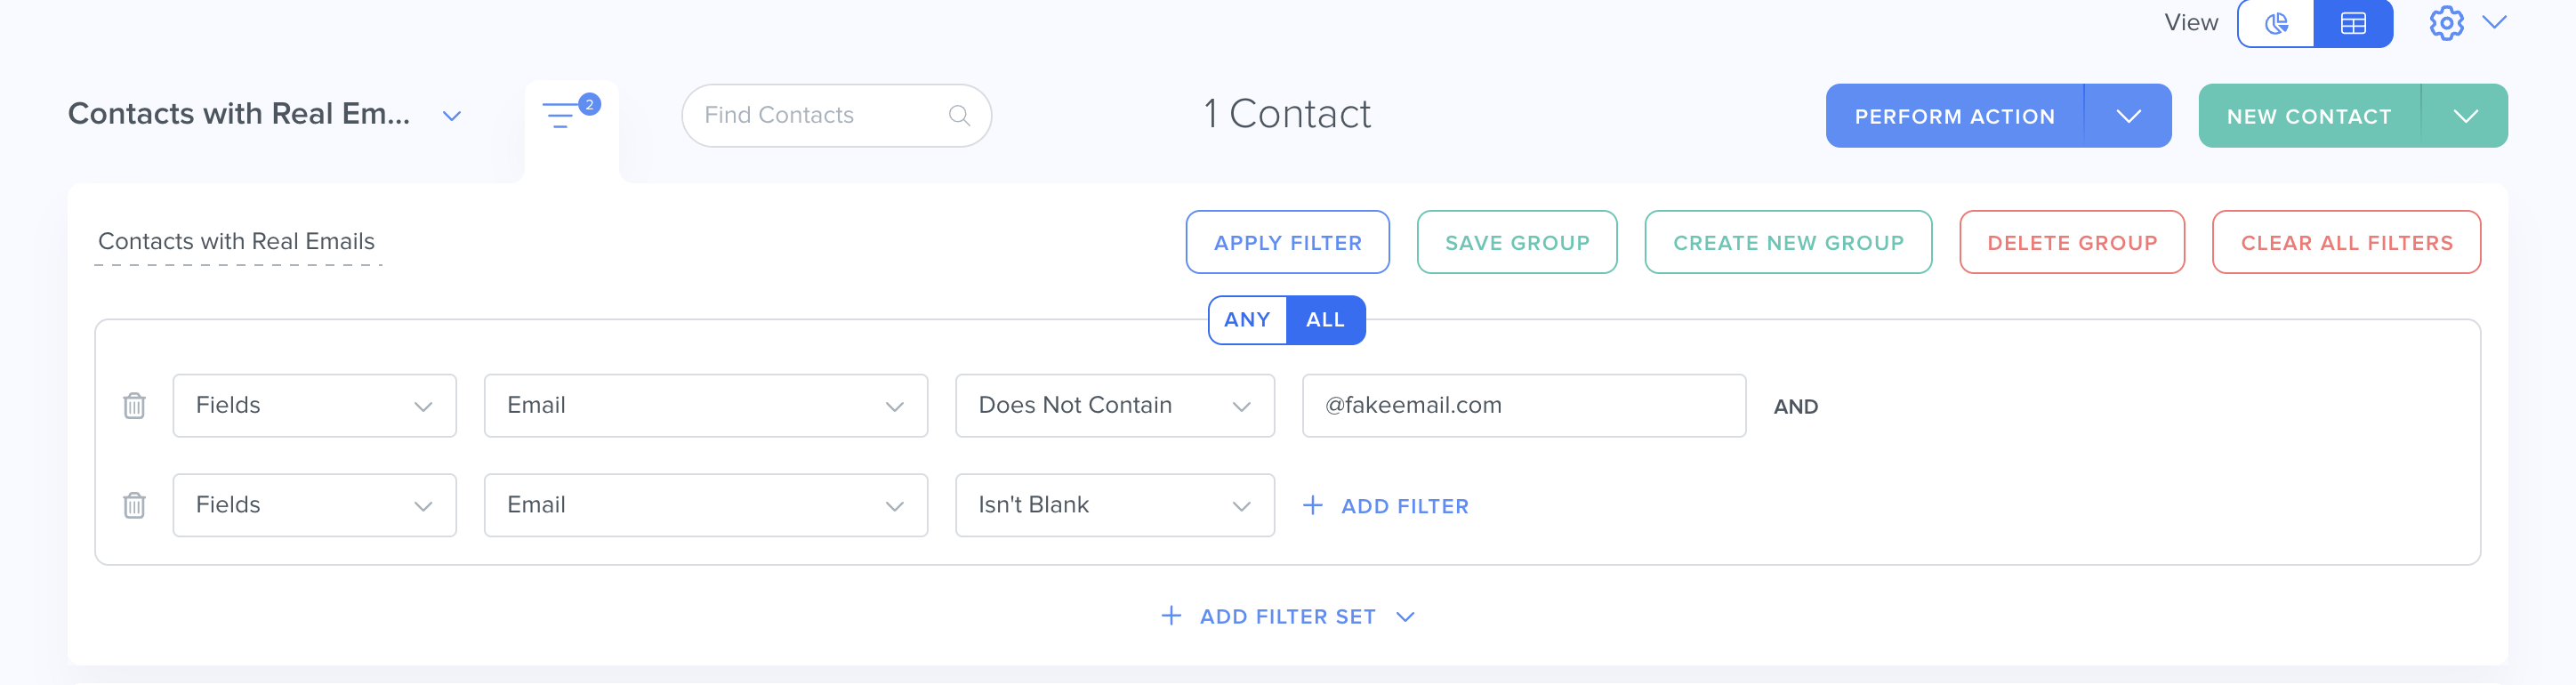
Email addresses serve as unique identifiers for Contact records in Kizen. When a Contact doesn't have an email, you can use "dummy emails" using domains like @fakeemail.com or @noemail.com. To ensure you are only sending emails to Contacts with real emails, create a filtered group. Set up a filter that searches for records with an Email field value that does not contain the dummy email domain and is not blank, and then click "Create New Group."
Once the Filter Group is saved, any Contact that meets the filter criteria, will be added to the group automatically.
Tracking Survey/Form Submissions
Forms and Surveys are useful tools for collecting information or feedback from customers. When a form is submitted, the customer's information is automatically added to (or updated in) the related entity in your system.
The Form/Survey filter lets you view data collected from a specific form, either from all time or within a date range. You can also filter by specific submission results or keywords. For example, you can use the filters to identify customers who gave a score of 7 or less on your NPS survey:

Related Articles
- How to Filter by Scheduled Or Completed Activities
- Contact Groups
- How to Edit and Delete a Custom Object
Still Need Help?
If you encounter any issues, contact support@kizen.com
Was this article helpful?
That’s Great!
Thank you for your feedback
Sorry! We couldn't be helpful
Thank you for your feedback
Feedback sent
We appreciate your effort and will try to fix the article